

Creating a New Videobot
The Create Videobot wizard walks you through picking a starting point and building a bot step by step. There are three ways to start — from a prompt, from a website URL, or from a blank template — and every AI-assisted path lets you preview, refine, and iterate through chat before the bot is created.
Starting a New Videobot
- Open the Videobots section from the main menu
- Click Create new in the upper right
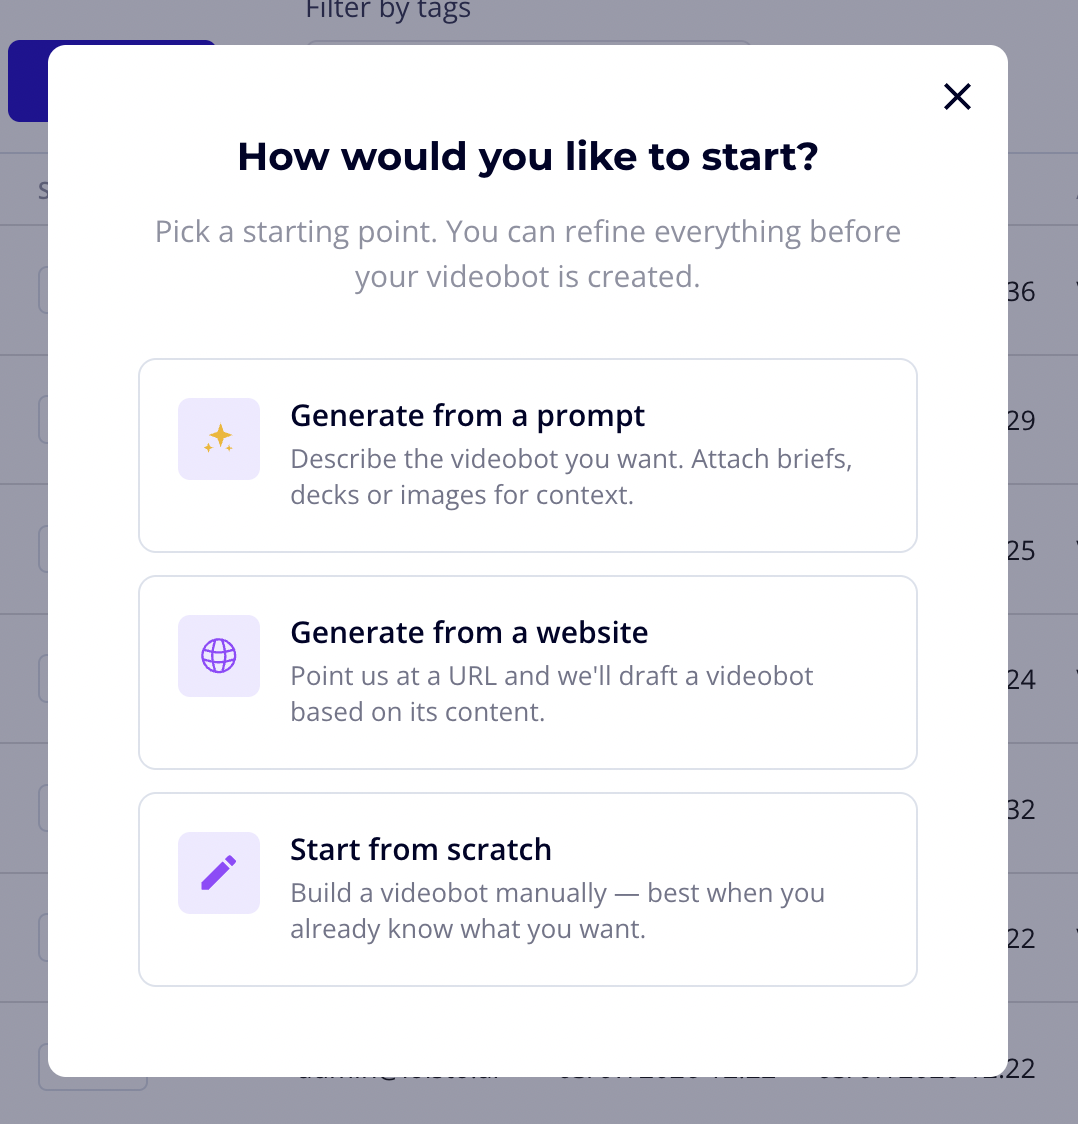
- Pick one of the three starting points:
- Generate from a prompt — describe what you want, optionally attach source files
- Generate from a website — point us at a URL and we'll draft a videobot from its content
- Start from scratch — a blank videobot named and configured by you
Generate from a Prompt
The prompt-based path is a 3- or 4-step wizard depending on the mode you pick.
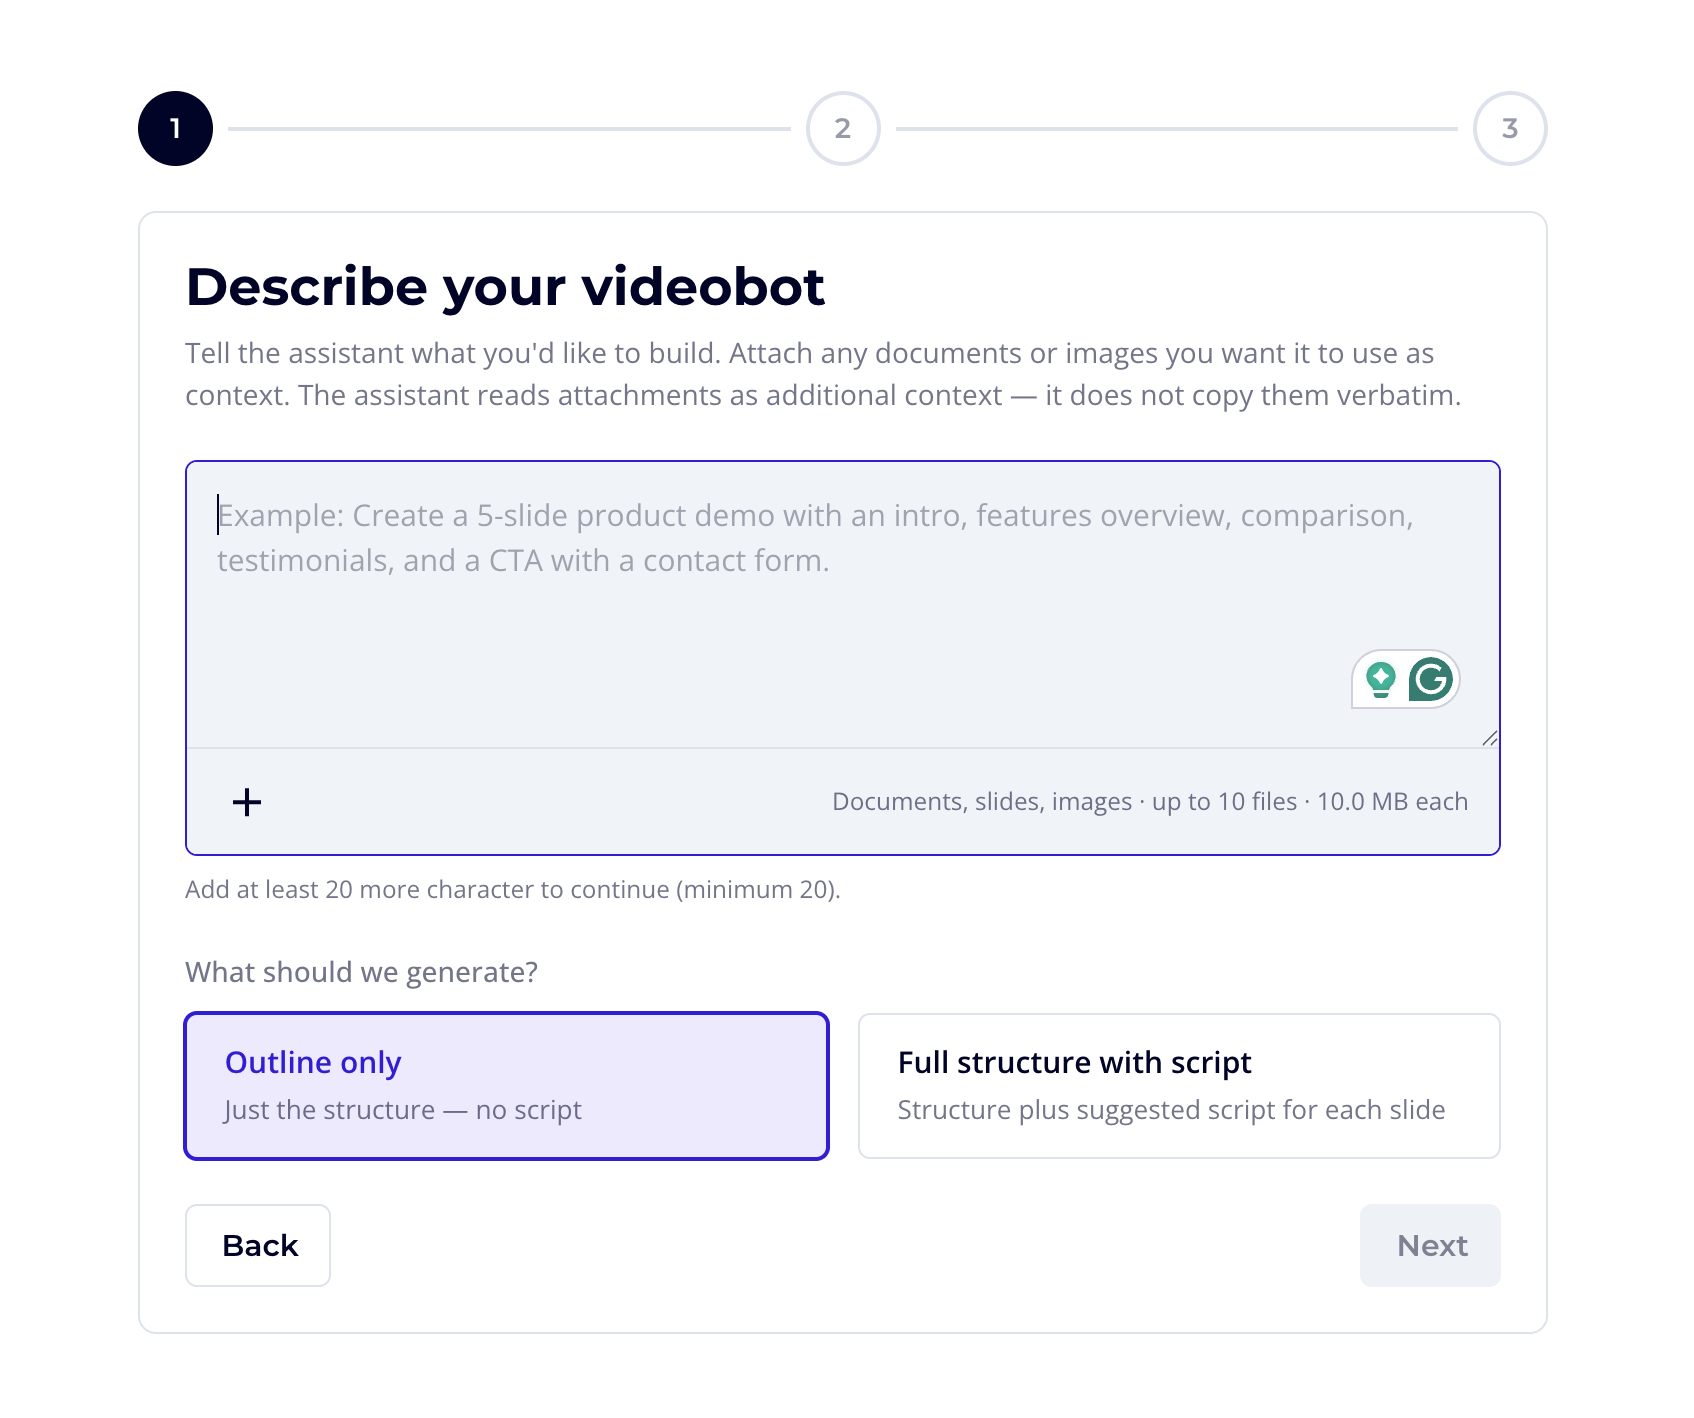
Step 1: Describe your videobot
Tell the assistant what you'd like to build. You can:
- Type a description of the videobot (minimum 20 characters)
- Attach documents, slide decks, or images the assistant should read as context
- Choose what to generate:
- Outline only — just the slide structure (titles + descriptions), no script
- Full structure with script — slides plus a suggested script for each
Tone and language pickers appear only when Full structure with script is selected. Outline-only generation doesn't apply tone or language.
Attachments
| Constraint | Value |
|---|---|
| Max files | 10 |
| Max size per file | 10 MB |
| Supported types | PDF, Word (.doc, .docx), PowerPoint (.ppt, .pptx), plain text, images |
NOTE
Attachments are read as additional context for the prompt. They are not copied verbatim into the videobot.
Step 2: Review Script / Review Outline
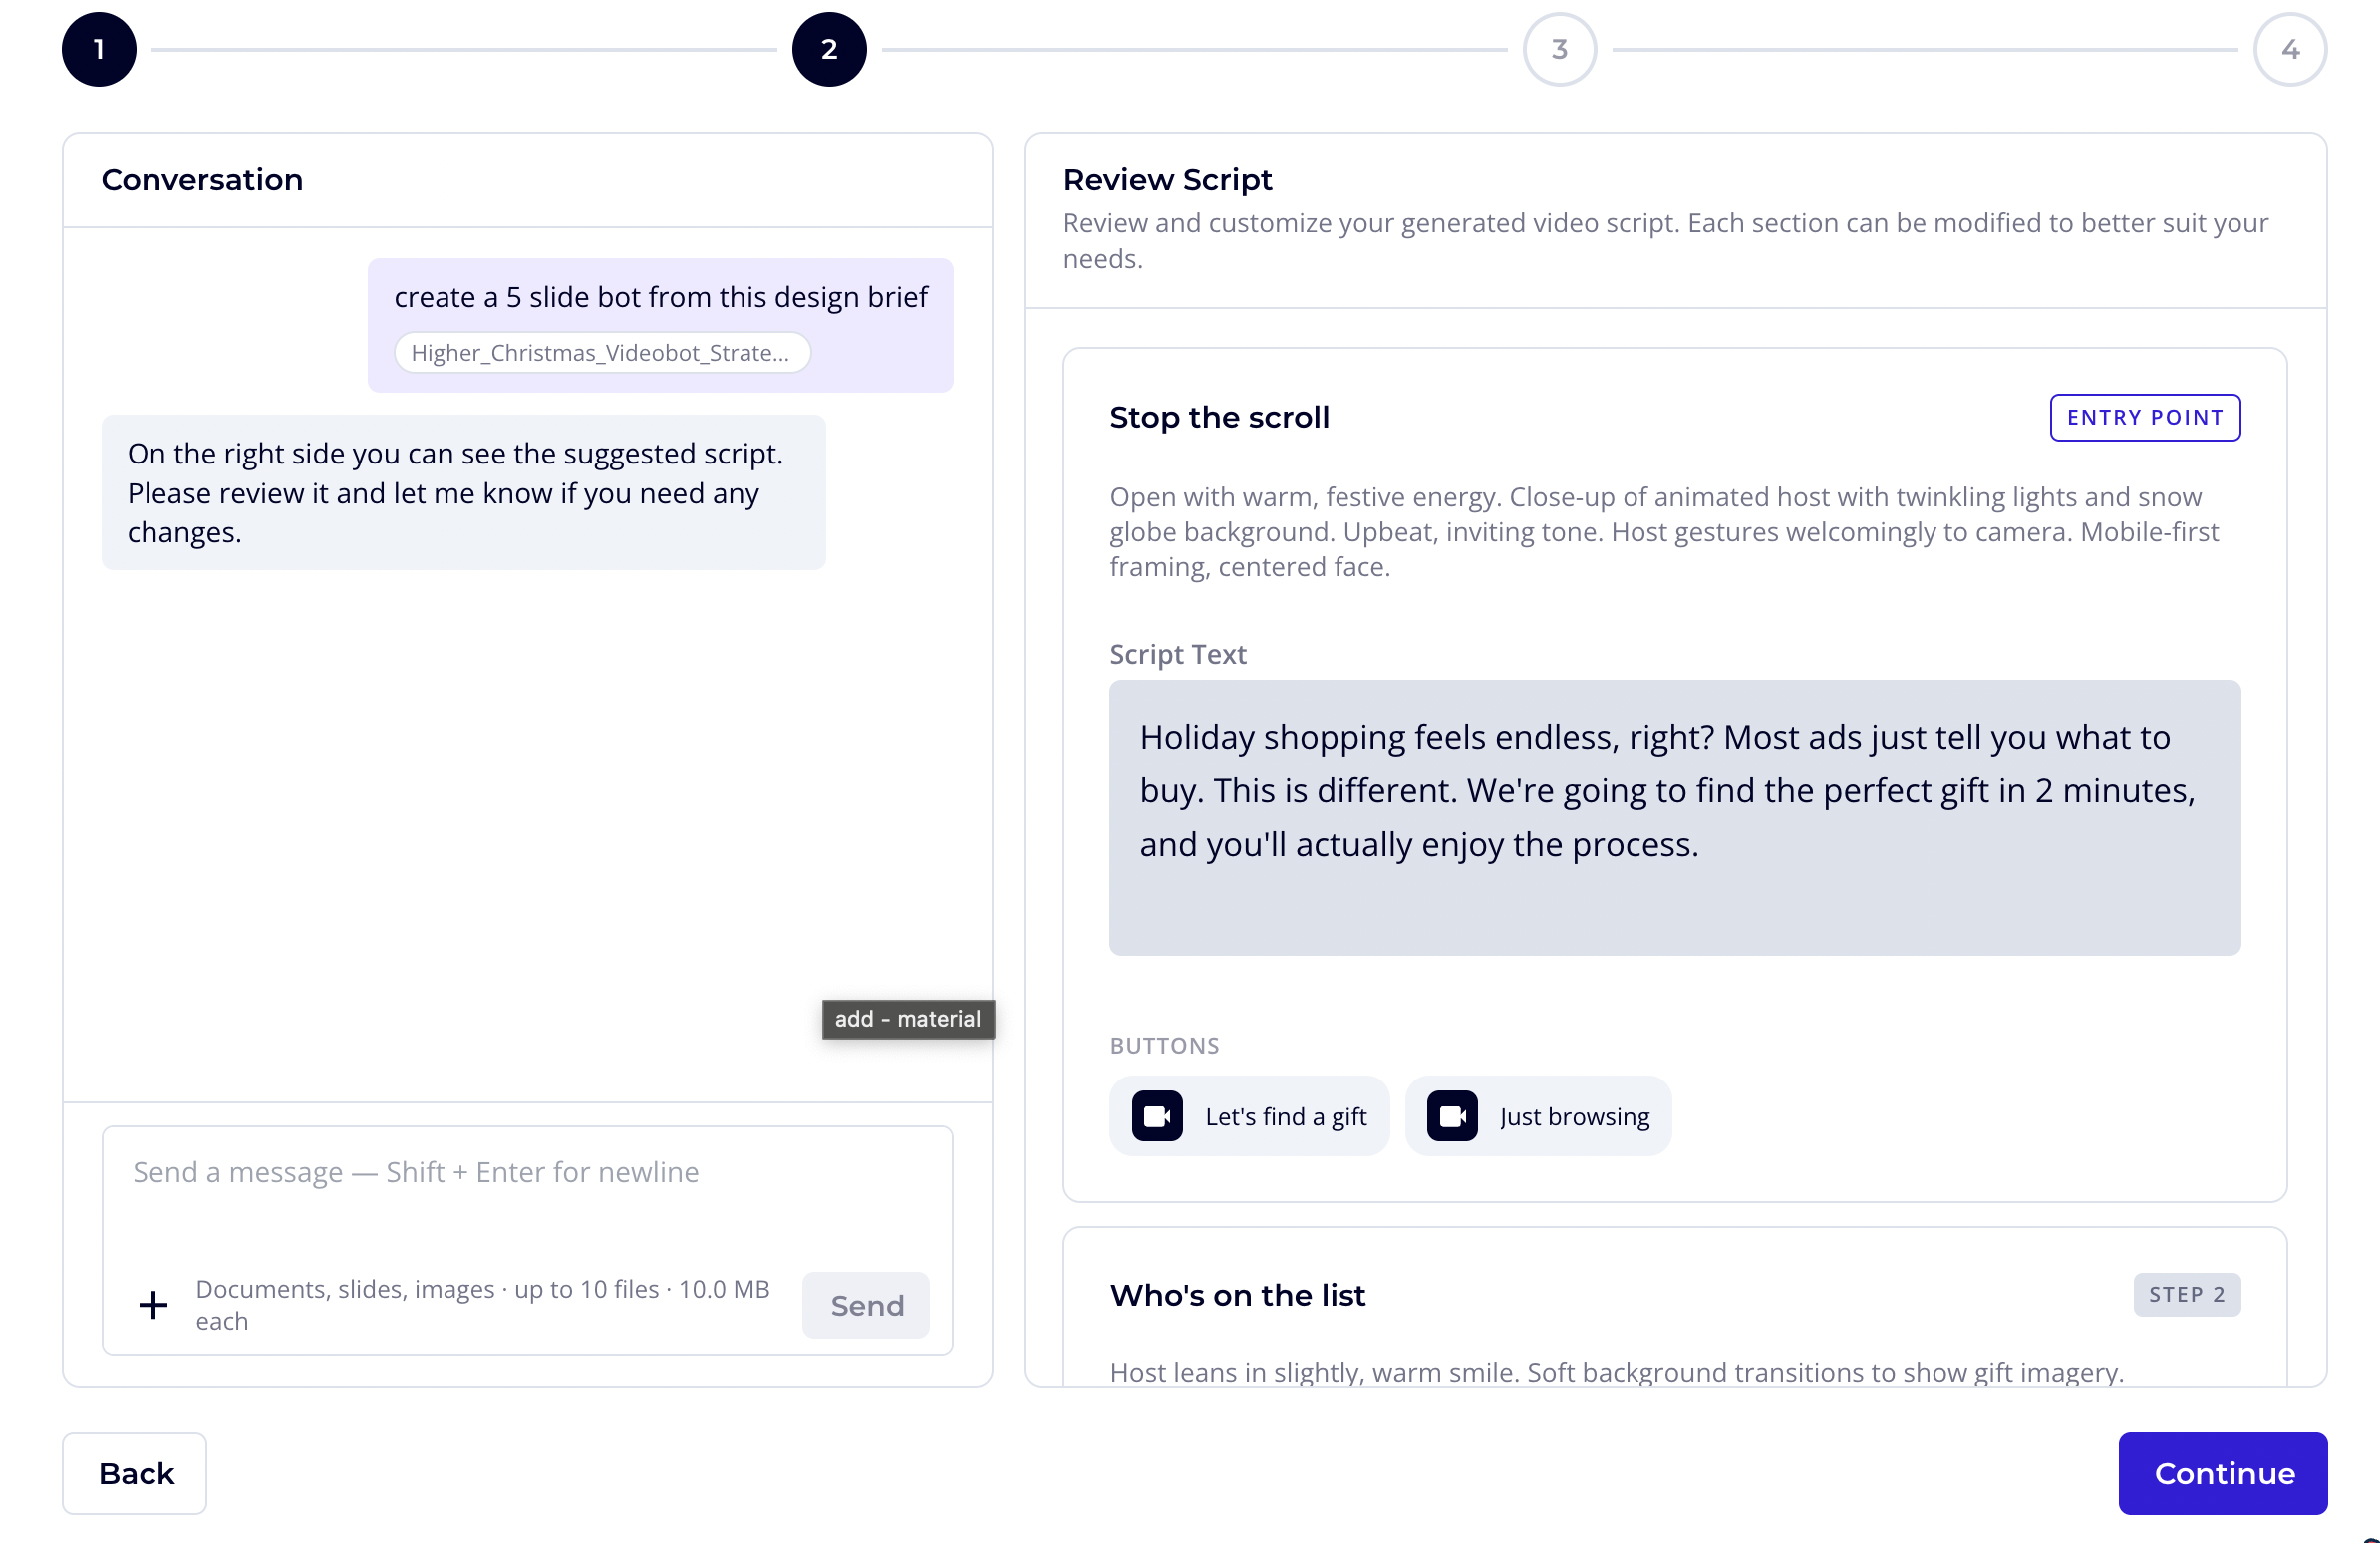
A two-panel view:
- Left — Conversation: a chat with the AI. Every generation, refinement, and system message appears here.
- Right — Review Script / Review Outline: the generated slide structure. Each slide shows a title, description, and (in Full mode) suggested script text and buttons.
Refine the result by typing follow-up prompts in the chat, for example:
- "Change the second slide to have a fourth option"
- "Make the tone less formal"
- "Swap scenes three and four"
Each refinement uses the previous result as context — the AI iterates on what's there, it doesn't restart from scratch.
Step 3: Choose Visuals (Full script only)
Pick a color palette for your CTA buttons. Every palette defines two colors:
- Default — applied to standard buttons
- Highlight — applied to featured / highlight buttons
There are three palette cards. Two are theme-derived (Bold, Dark). The third is either a curated Vibrant palette or your brand, if you shared brand colors.
To use your own brand colors:
- In the chat, share hex codes (e.g.
#FF6600 #202020) — the first becomes default, the second becomes highlight - Or attach a brand image — the assistant extracts the dominant colors from it
Selecting a palette is optional. Skip this step to use the default videobot styling.
NOTE
Outline-only generation skips this step — there are no buttons yet.

Final Step: Name & Privacy
The last step captures the videobot's name and privacy setting.
| Field | Options |
|---|---|
| Name | Any text (required) |
| Privacy | Public (default) or Private |
Click Create Videobot to finalize. You'll land in the videobot editor once creation completes.

Generate from a Website
The URL-based path is a 5-step wizard. The AI analyzes your site, offers script directions, and helps refine the result.
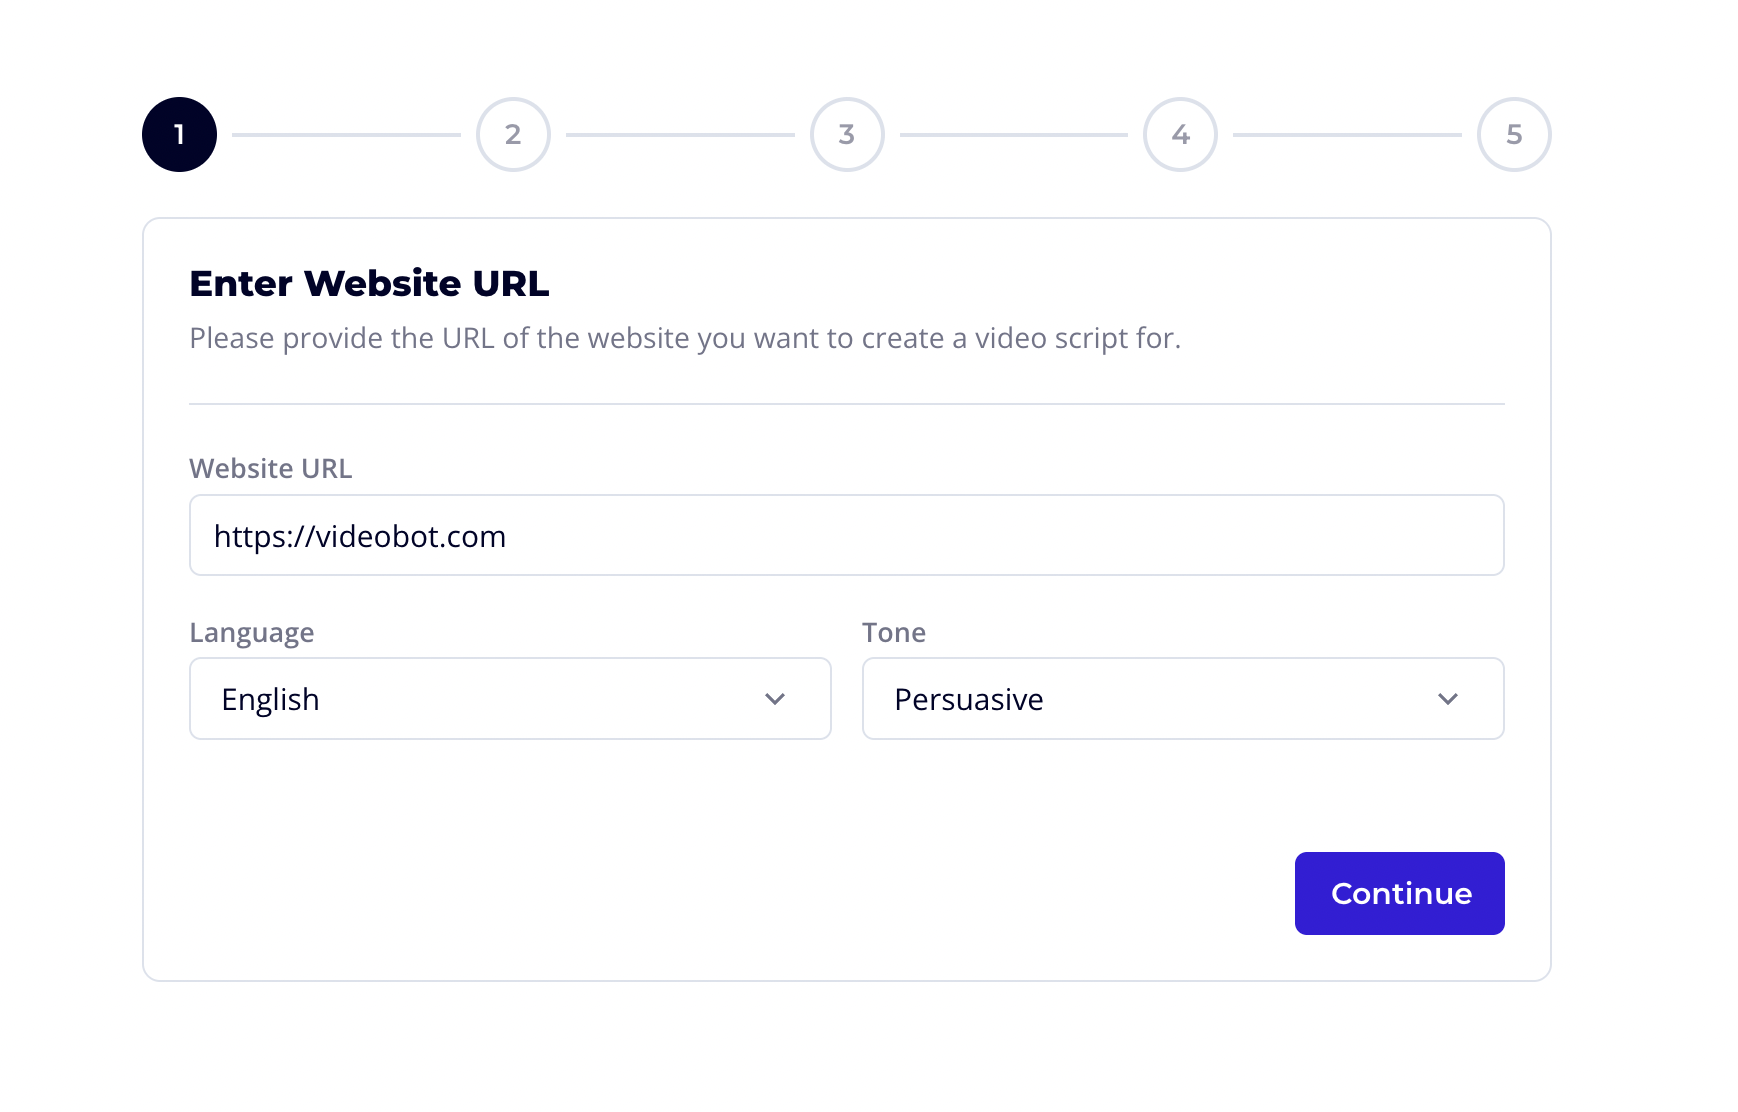
Step 1: Enter Website URL
Provide the URL of the website you want the videobot to represent. Also pick a language and tone.
Only HTTP and HTTPS URLs are accepted — invalid URLs show an inline error.
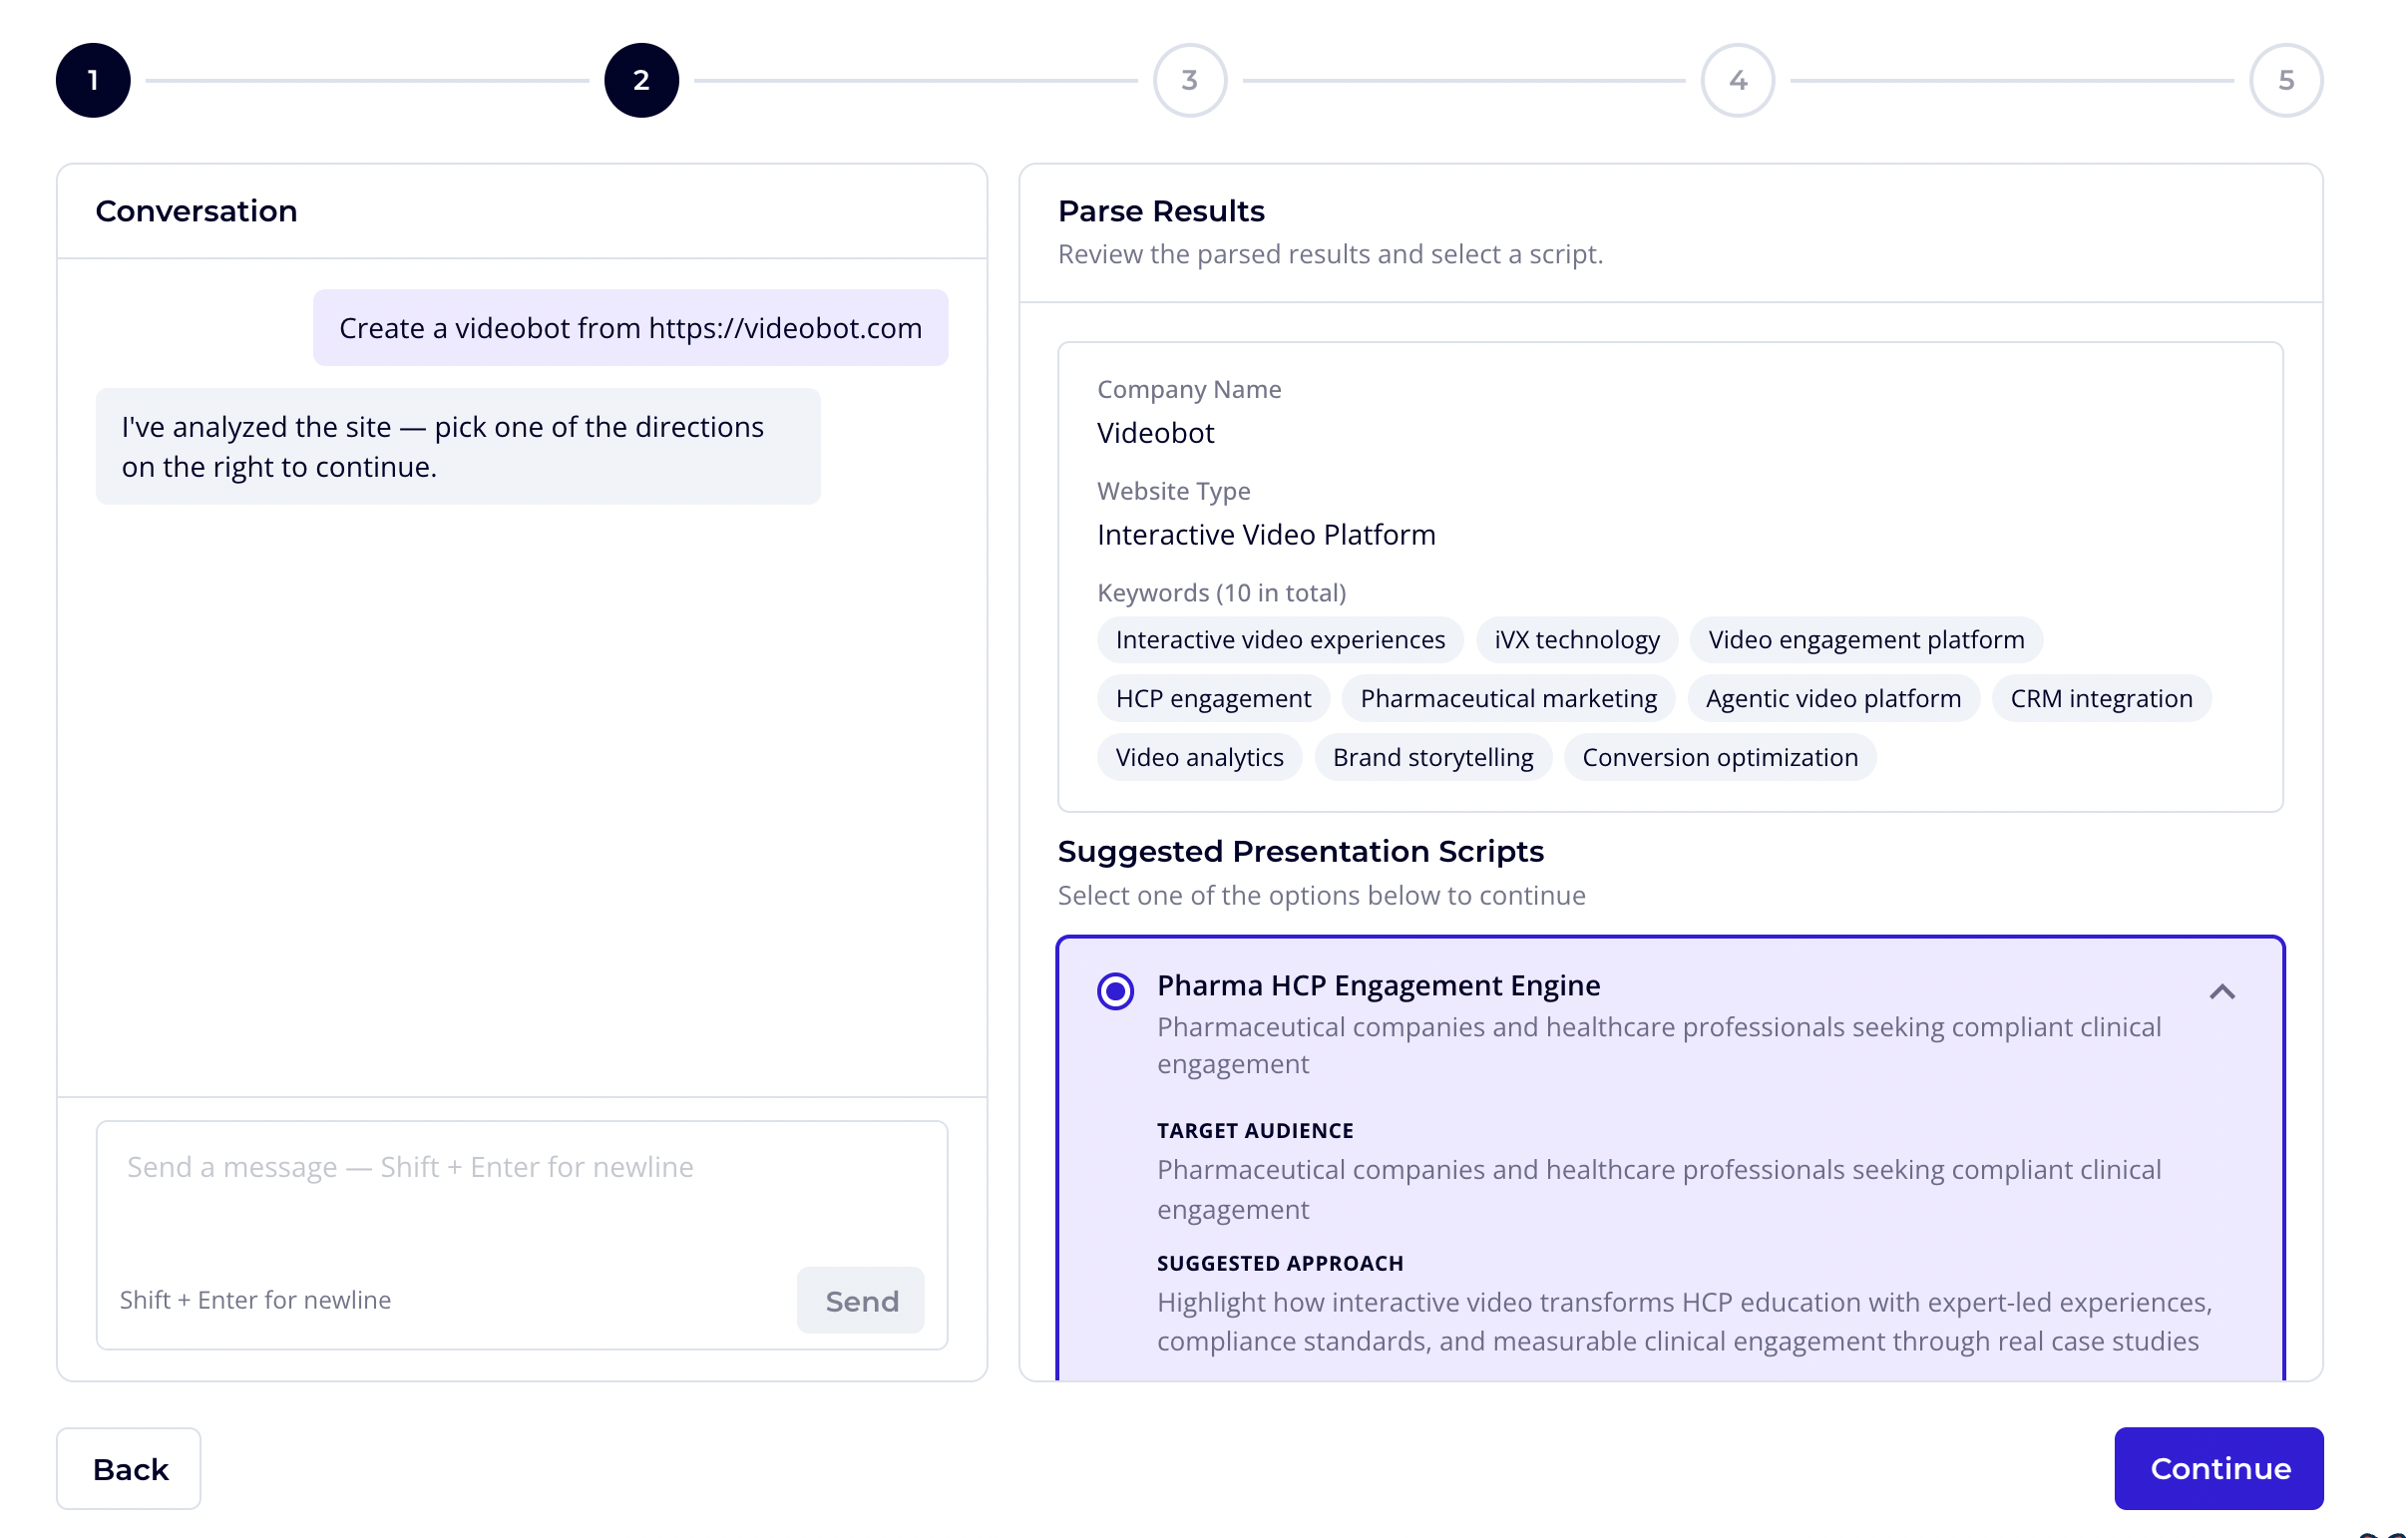
Step 2: Parse Results
The right panel shows what the AI extracted from your site:
- Company Name — inferred from the site
- Website Type — e.g. "SaaS platform"
- Keywords — key themes from the content
- Suggested Presentation Scripts — several possible script directions to choose from
Each script direction expands to show its target audience and suggested approach. Select the one that fits your use case.
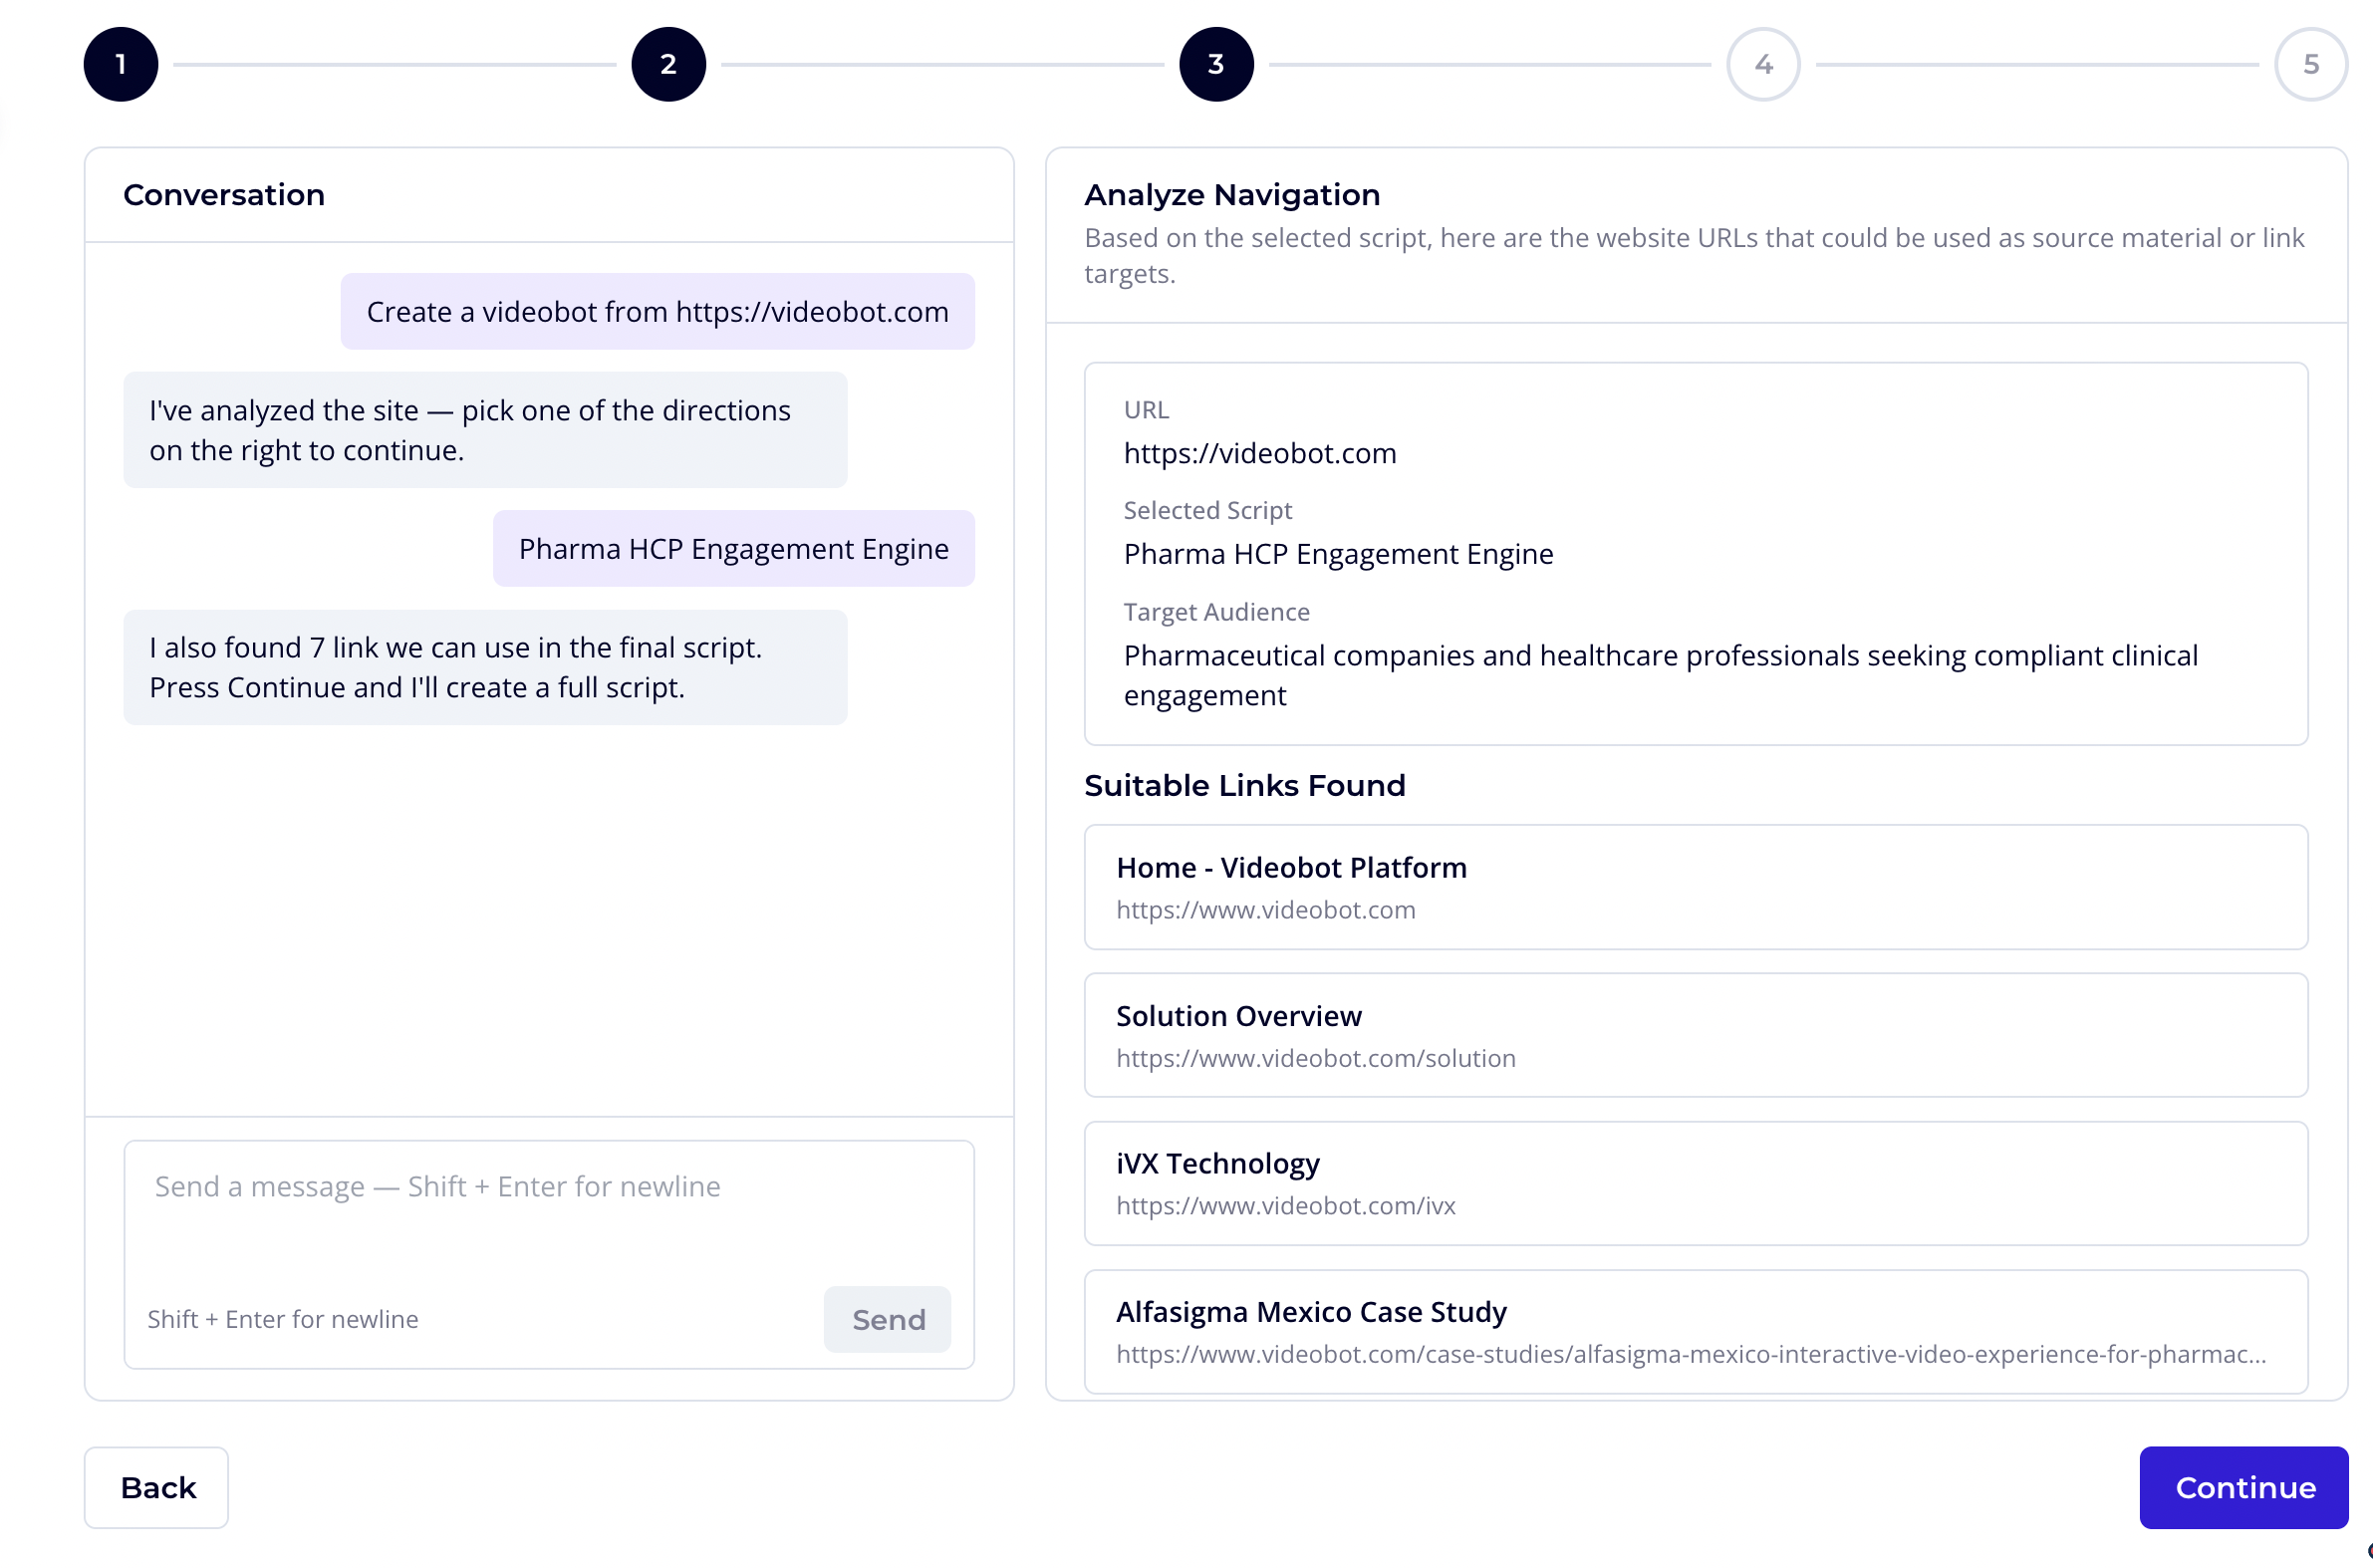
Step 3: Analyze Navigation
Confirms the URL, selected script, target audience, and shows the navigation links the AI found on your site. These links become source material for the script and potential CTA destinations.
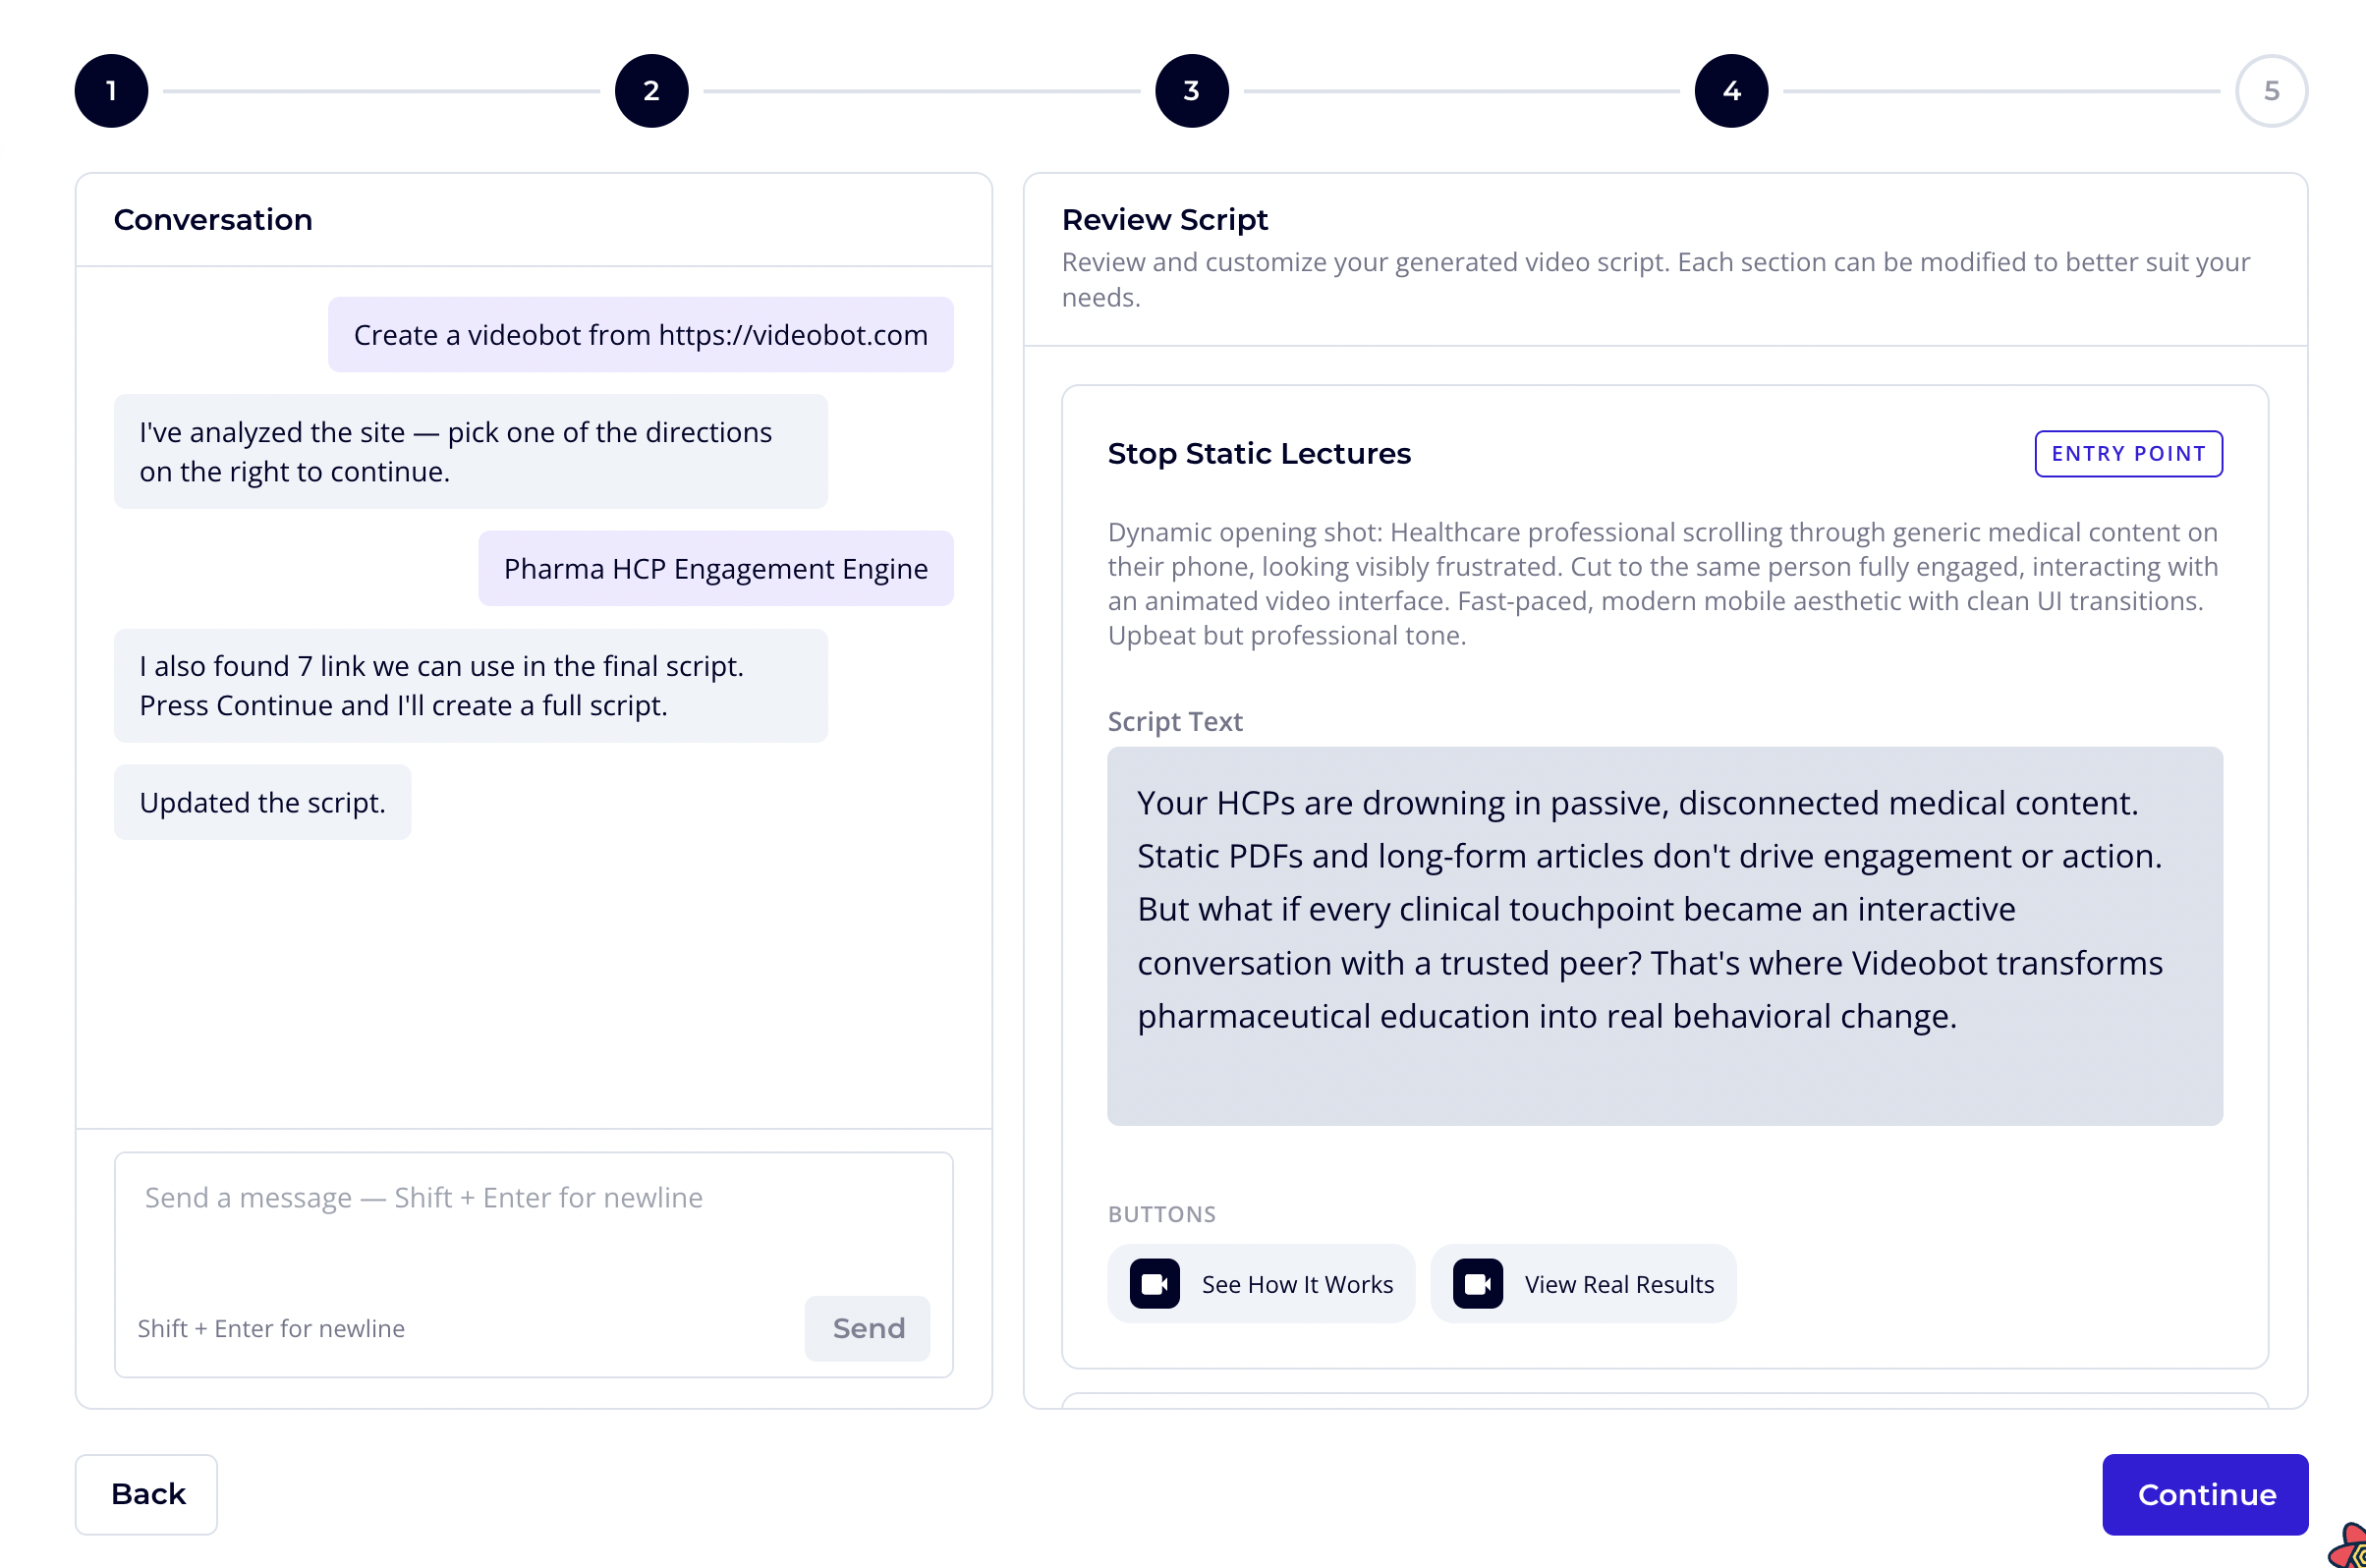
Step 4: Review Script
Same two-panel review as the prompt path — chat on the left, editable script on the right. Refine via natural-language messages in the chat.
Step 5: Name & Privacy
Same final step as the prompt path — enter a name, choose Public or Private, and click Create Videobot.
Start from Scratch
For when you already know what you want to build.
- Click Start from scratch in the picker
- Enter a Name (defaults to "Videobot")
- Choose Privacy — Public or Private
- Click Create Videobot
You'll land directly in the videobot editor with an empty bot ready to configure.
Conversational Refinement
Both AI paths share the same chat-based refinement pattern:
- Type a change in natural language and press Send
- The AI applies the change to the current draft and shows the updated result
- Refinements are cumulative — each one builds on the previous result
- You can accept and continue at any time; refinement is optional
Attachments in the chat work the same way as step 1's initial attachments — same file types and limits.
Discarding a Draft
Going back to edit the original prompt or URL discards the in-progress draft and conversation. A confirmation modal asks before this happens.
Leaving the wizard page — either by clicking a navigation link, or by refreshing / closing the tab — also asks for confirmation:
- In-app navigation (sidebar clicks, links) shows the styled "Discard current draft?" modal
- Browser navigation (refresh, close tab, browser back) shows the browser's native "Leave site?" prompt
Confirmations only fire when there's real work to lose — an empty wizard leaves silently.
Best Practices
- Give context, not just an idea: attachments significantly improve the AI's output. A short prompt plus a slide deck beats a long prompt alone.
- Start with Outline: for early exploration, pick Outline mode to iterate on structure without waiting for full script generation.
- Refine in small steps: one focused change per chat message ("shorten slide 2", "make the CTA more direct") produces better results than a paragraph of feedback.
- Use brand colors: sharing hex codes or a logo image in the visuals step personalizes CTAs without extra editor work.
- Name at the end, not the start: the wizard captures name and privacy last, after you've seen the actual output — leverage that to name based on what was created, not what you planned.
- Skip when unsure: visuals and refinement are both optional. If the first draft looks right, click Continue and finalize.