

Subtitles
Subtitles (captions) make your videos accessible and let visitors follow along with the sound off. You add them to a video in the Media library, then switch captions on in each videobot that should show them.
Subtitle files use the .vtt (WebVTT) format.
How you add and edit subtitles depends on whether your account has the new Media Studio:
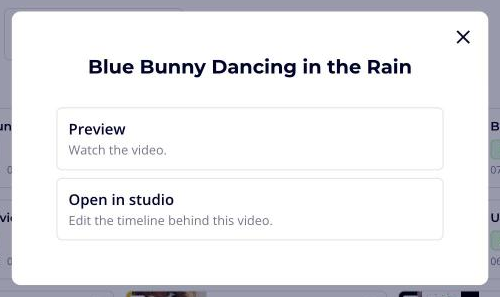
- If your account has access to the new Media Studio, clicking a video in Media → Video offers Open in studio. Subtitles are written and edited there. See With Media Studio.
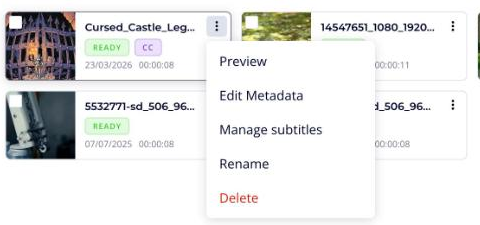
- If you see Manage subtitles in the video's three-dot menu instead, see Without Media Studio.
Note: Media Studio is being rolled out gradually. If you do not see Open in studio, the feature is not enabled for your account yet. Contact your Customer success specialist.
With Media Studio
In Media Studio, subtitles are part of the video's timeline. You write or import them next to the picture, time them against the video, and they are put on the video when you render it.
Open the Subtitles tab
- Go to Media → Video and click the video.
- Choose Open in studio.
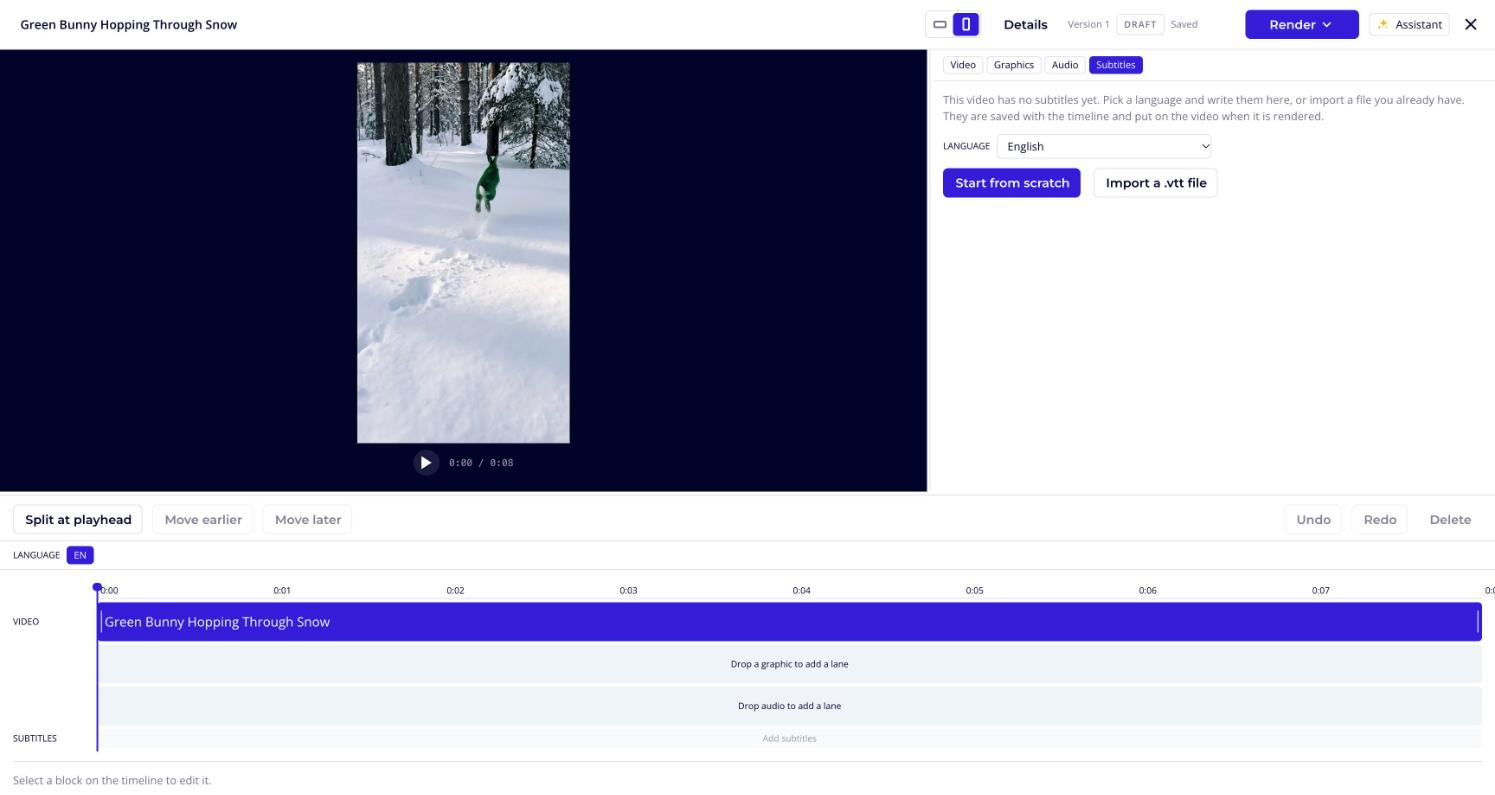
- Open the Subtitles tab beside the picture, or click Add subtitles in the Subtitles lane at the bottom of the timeline.
Add subtitles
- Choose the Language. It defaults to the video's own language.
- Pick how to start:
- Start from scratch creates the first subtitle at the playhead, ready for you to type.
- Import a .vtt file loads a subtitle file you already have.
- Bring in {language} appears when the video already has subtitles from before Media Studio. It copies them into the timeline so you can edit them.
Important: Subtitles the video already had are not carried into Media Studio automatically. Use Bring in before you render, otherwise the new video is made without them.
Edit subtitles
Each subtitle is a row with its start and end time and its text. The same subtitles appear as blocks in the Subtitles lane of the timeline, and the current line is shown over the picture.
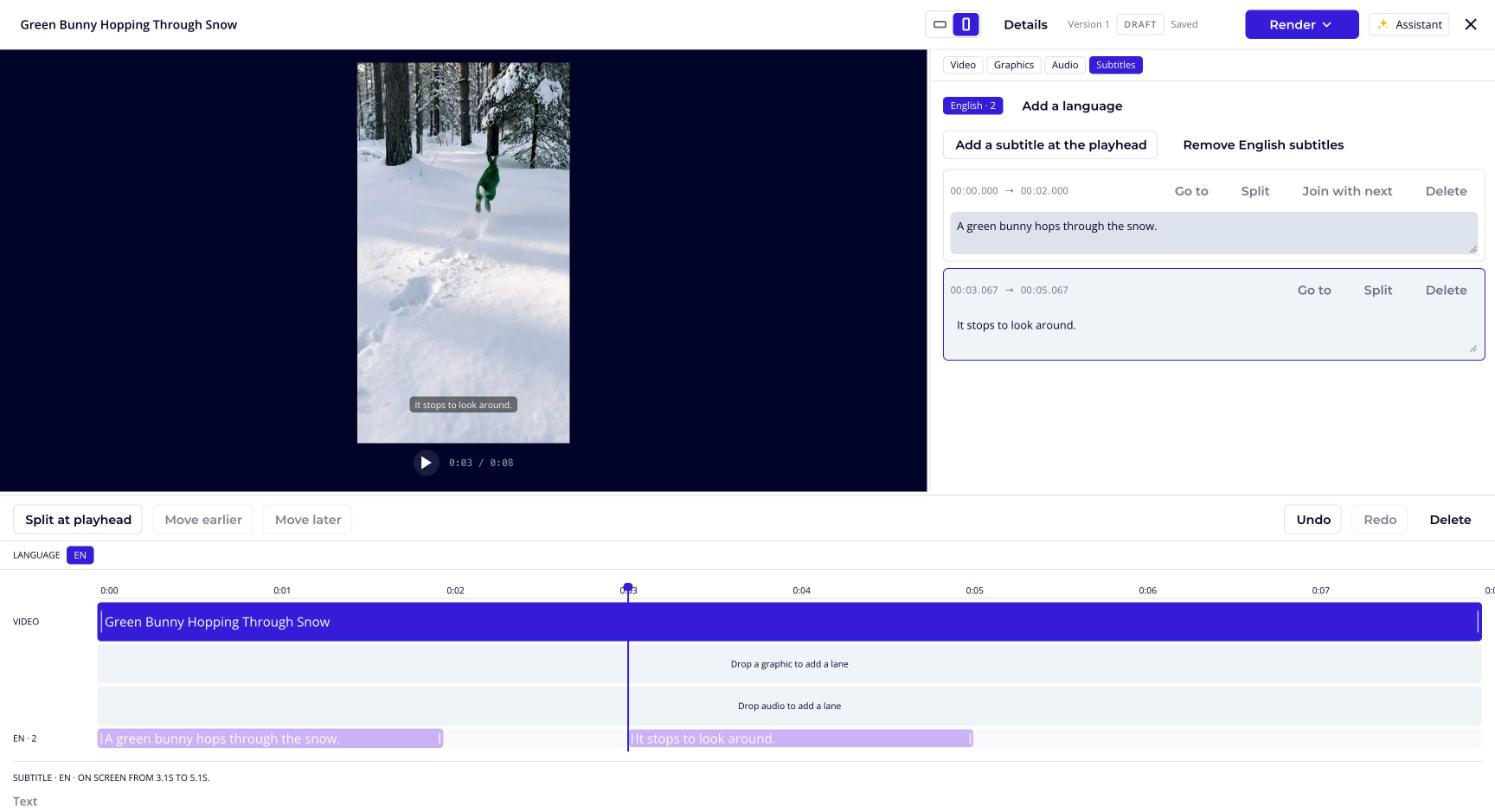
- Text: type in the row's text box.
- Timing: edit the start and end times in the row, or drag a block on the timeline to move it and drag its edges to make it longer or shorter. A subtitle cannot overlap its neighbours.
- Add a subtitle at the playhead: move the playhead to a gap and click the button. If there is no room, move the playhead or shorten the subtitle before it.
- Go to: jumps the video to that subtitle.
- Split: cuts the subtitle in two at the playhead, or in the middle if the playhead is elsewhere.
- Join with next: merges the subtitle with the one after it.
- Delete: removes the subtitle.
Media Studio warns you when a subtitle is hard to read. These warnings never stop you from saving or rendering:
- This is a lot to read in the time it is on screen. Shorten the text or keep it on screen longer.
- This is longer than two lines of subtitles can show. Split it into two subtitles.
If you cut the video after timing its subtitles, a notice tells you they may no longer line up. Check them against the video, fix what has moved, and click They still line up.
Add more languages
- Click Add a language at the top of the Subtitles tab.
- Choose the Language.
- Start from scratch, import a .vtt file, or click Copy from {language} to copy the timing and text of a language you already have, then translate the text line by line.
Click a language at the top of the tab to switch between them. Remove {language} subtitles deletes all subtitles in the language on show.
Save and publish
There is no save button. Every change is saved with the timeline, and the status next to Render shows Saving… and Saved. Undo and Redo work for subtitle changes too.
Subtitles reach the video your visitors see when you render it:
- Click Render → Render & publish.
- Tick the videobots that should switch to the new video, choose how to update them, and confirm.
Note: A render currently puts the video's main language on the video. Subtitles in other languages are saved with the timeline.
Without Media Studio
Without Media Studio, subtitles are managed per video from the Manage subtitles panel.
Open Manage subtitles
- Go to Media → Video.
- Click the three dots next to the video and choose Manage subtitles.
The panel lists the video's subtitles by language, with their type, status and upload time. A subtitle is ready to use when its status is Ready. While it is being generated or translated, the status is Processing.
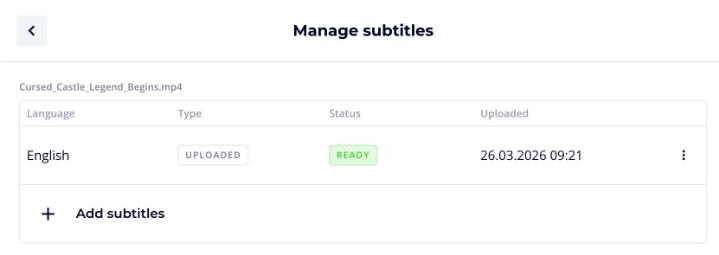
Use the three dots on a row to Edit the subtitles in the Caption Editor, Download them as a .vtt file, or Delete them.
Add subtitles
Click Add subtitles. You can add subtitles in four ways:
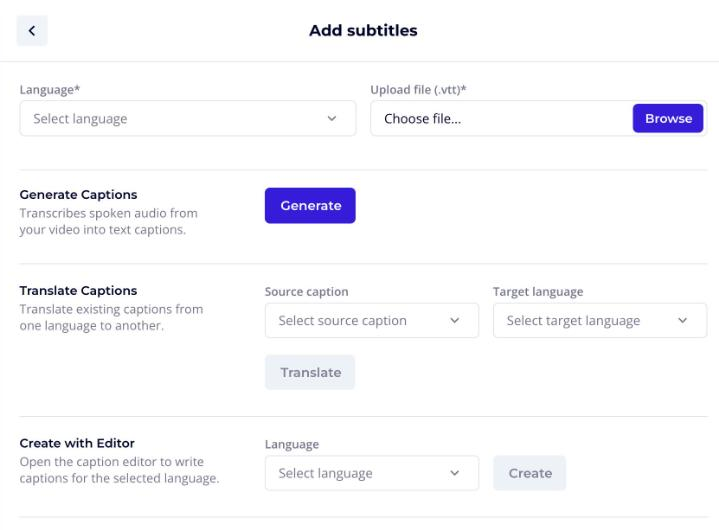
Upload a .vtt file
- Select the Language.
- Click Browse and choose the .vtt file.
- Click Save.
If the file cannot be read, the panel shows the line where the problem is.
Generate Captions
Click Generate to transcribe the spoken audio of the video into captions. Generation runs in the background, and the new captions appear in the Manage subtitles panel when they are ready. Read them through and correct them in the Caption Editor before using them.
Translate Captions
- Choose the Source caption, the language to translate from.
- Choose the Target language.
- Click Translate.
The translation runs in the background and appears in the panel as a new language. Check it before using it.
Create with Editor
Choose a Language and click Create to write captions by hand in the Caption Editor.
Caption Editor
The Caption Editor shows the video on the left and the list of captions on the right.
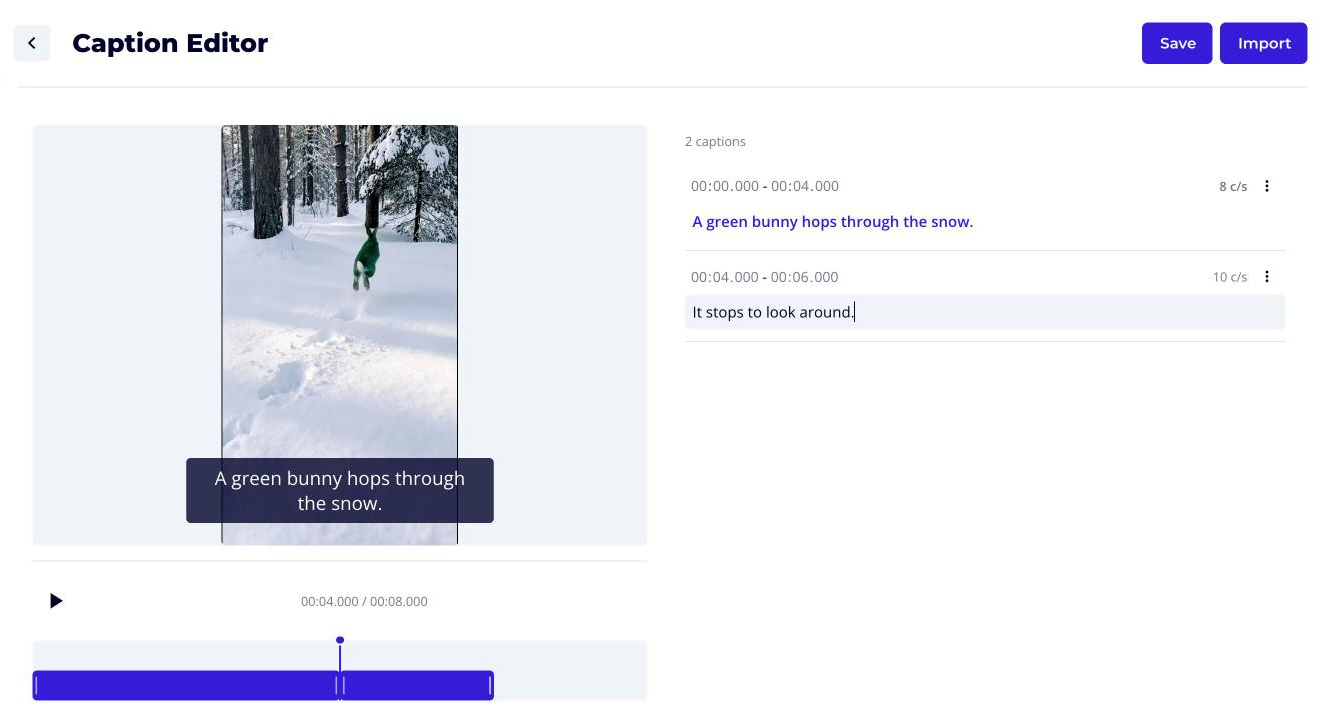
- Text and timing: each caption has a start time, an end time and its text. You can also drag captions on the bar under the video.
- Three-dot menu on a caption: Add segment below, Split segment, Merge with below and Delete segment.
- Reading speed: the c/s figure shows characters per second. Aim for 22 or less.
- Import: replaces the captions with the contents of a .vtt file.
- Save: saves your changes.
When you save, the editor checks the captions:
- Errors must be fixed before you can save: a caption with no text, captions that overlap or are out of order, or an end time before the start time.
- Warnings can be saved as they are: more than 42 characters on a line, more than two lines, a caption shorter than 0.83 seconds or longer than 7 seconds, or a reading speed above 22 characters per second.
If you leave with unsaved changes, you are asked whether to Exit or Save & Exit.
Show subtitles in a videobot
Adding subtitles to a video does not show them by itself. Switch captions on in each videobot:
- Go to Videobots → open the videobot.
- Go to Settings → Captions → Enable.
- Choose the Caption language, the default language for subtitles across the bot.
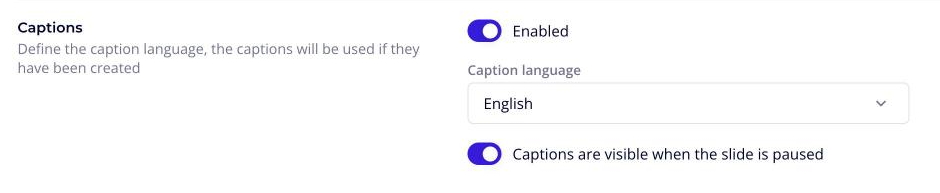
See Captions for the related player settings, and Override caption language for using subtitles in several languages within one videobot.