

Adding Slides 🎬
To add slides to your Videobot, navigate to the Content tab in the Videobot Builder. This is where you’ll create and manage the individual slides that make up your Videobot.
In the creation window, you can add slides. A slide is a crucial part of your Videobot that contains:
- Media: usually a video, but a slide can also show an image, a presentation, or a document. See Slide Types.
- Buttons (usually)

IMPORTANT
Always make sure to include an Intro slide! It's the first thing your audience will see and sets the tone for the rest of your Videobot.
Slide Types
Every slide has a Slide type. You choose it when you create the slide, and you can change it later in the Edit slide panel.
| Slide type | What the viewer sees |
|---|---|
| Video | A video. This is the default and the most common slide type. |
| Image | A still image, optionally with a slow pan or zoom animation. See Image Animation. |
| Presentation | An image, such as a presentation slide, shown together with a video of the speaker. |
| Document | A PDF or an image that viewers can zoom, pan, and page through. |
Image and Document slides have nothing to play, so they never move on by themselves. They stay on screen until the viewer presses a button.
Presentation Slides
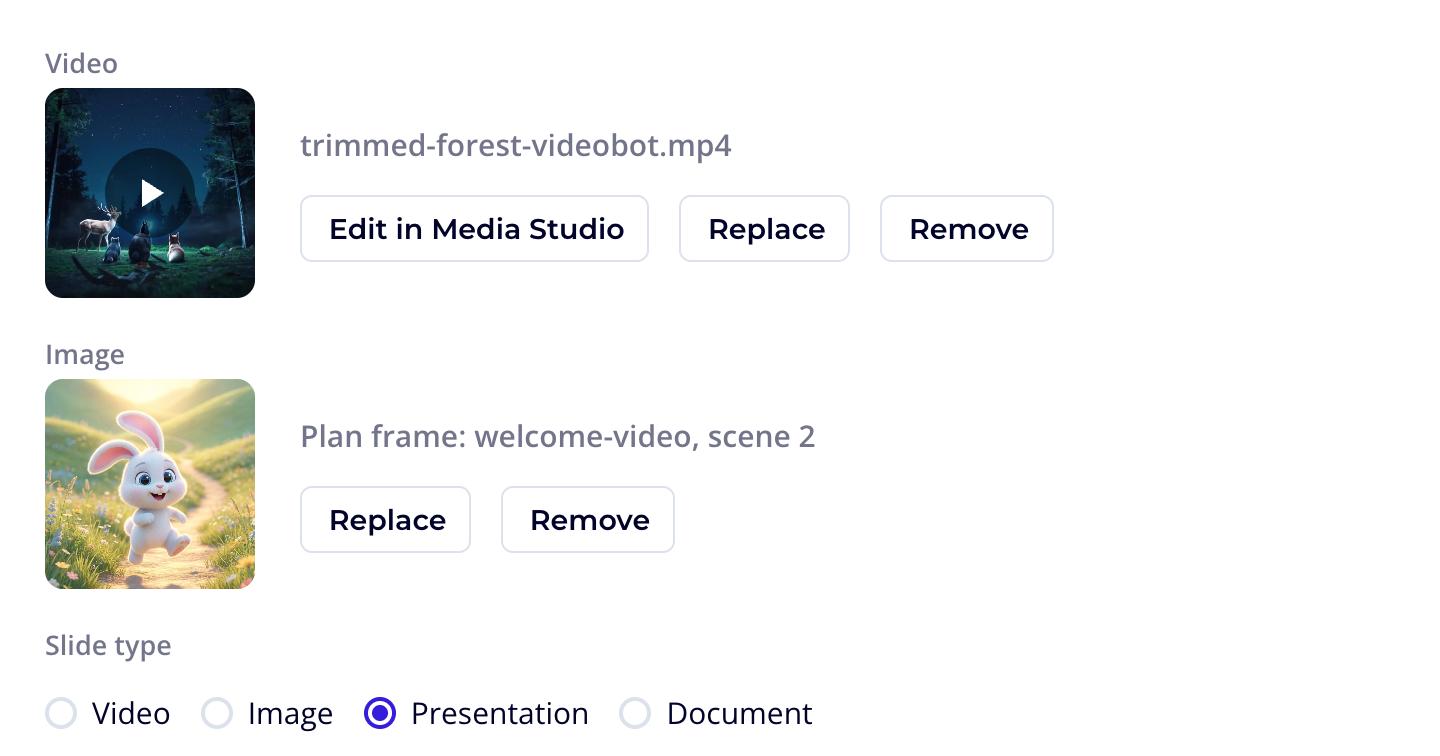
A Presentation slide has two media fields in the Edit slide panel:
- Video: the speaker video. It plays just like the video on a Video slide.
- Image: the slide graphic shown next to the video.
When the Videobot is taller than it is wide, such as on a phone held upright, the image is shown on top and the video below it. When the Videobot is wider than it is tall, the image is shown on the left and the video on the right.
Document Slides
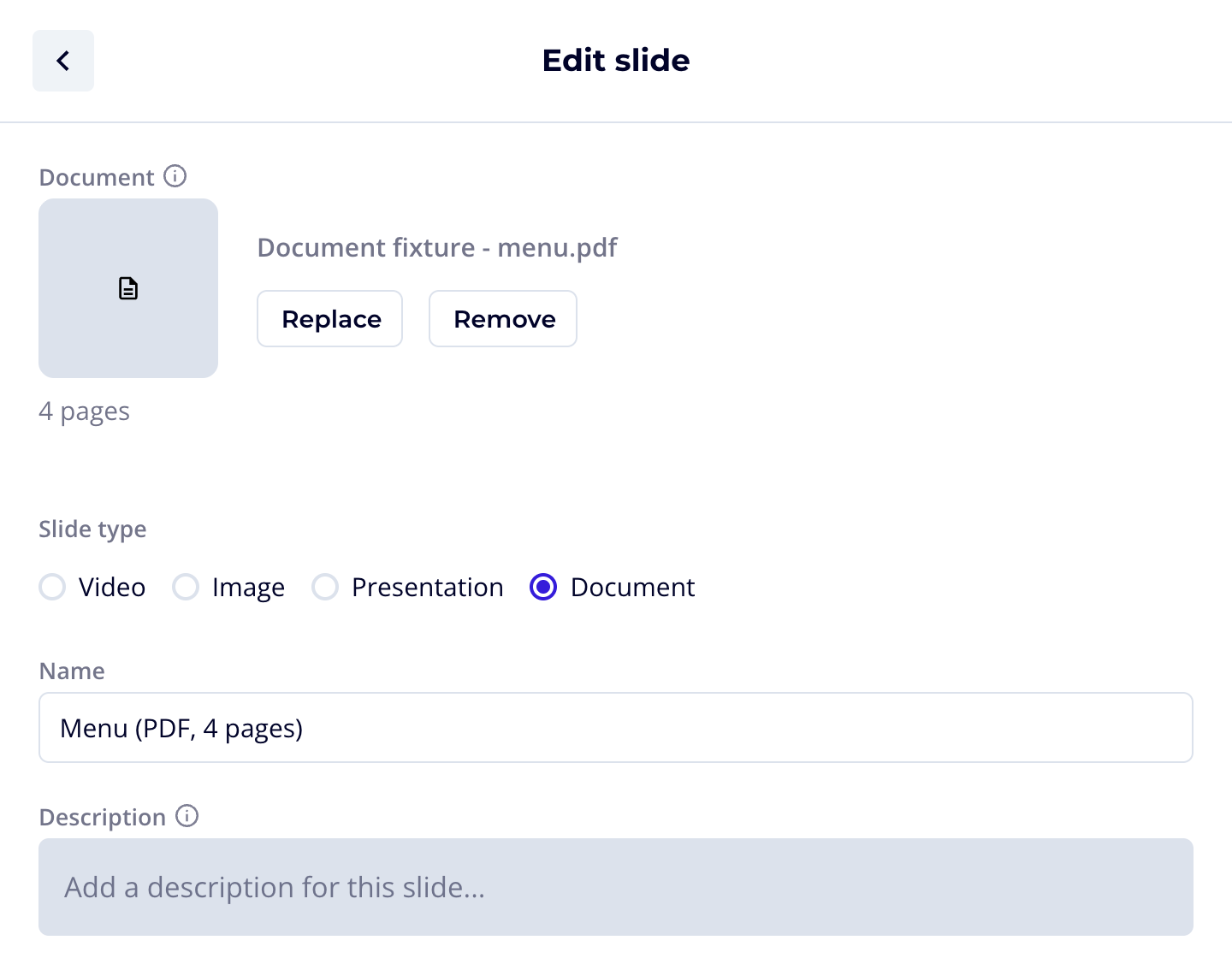
A Document slide shows a PDF or an image. Viewers can:
- zoom with the + and − buttons, by pinching, or with the mouse wheel,
- pan by dragging the zoomed page,
- page through a PDF with the arrow buttons, by swiping, or with the arrow keys on the keyboard.
When you choose a PDF, Videobot prepares its pages for viewing. While this is running, the Edit slide panel shows Preparing pages…, and once it is done, the number of pages. If preparing fails, click Try again.
Note: A Document slide shows a limited number of pages. If your PDF is longer, viewers see only the first pages, and the Edit slide panel tells you how many of them are shown.
How to Add a Slide:
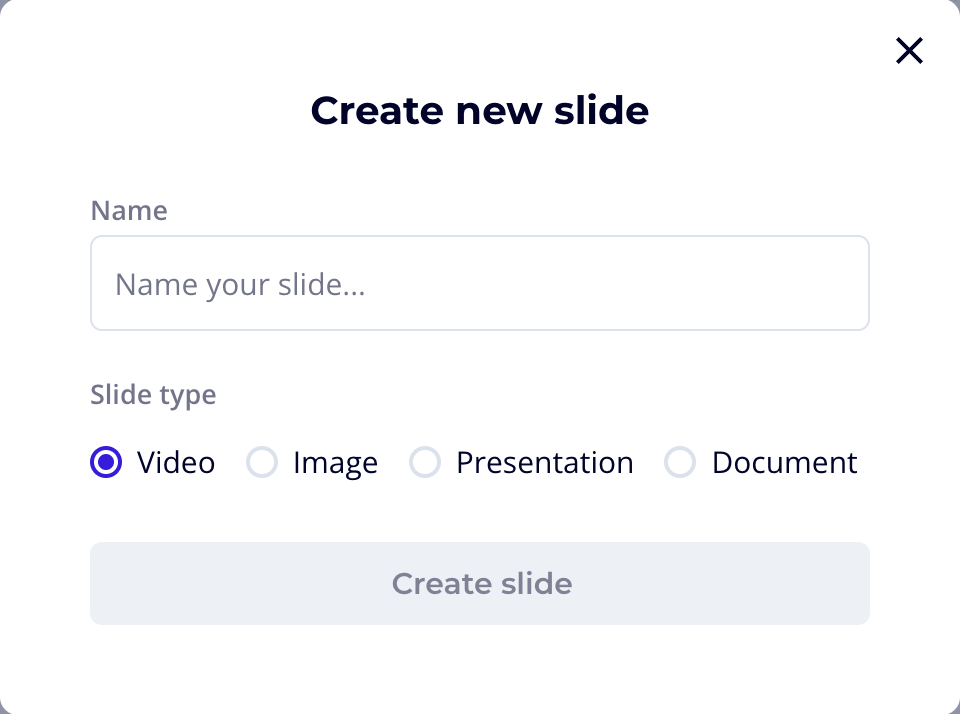
- Click Add slide.
- Give the slide a Name and choose the Slide type. If you are not sure, keep Video. Click Create slide.
- After you are automatically directed to the Edit Slide panel, add the media for the slide type you chose. For a Video slide, press the Add video button.

- Upload the media of your choice directly or select it from the Media library. A Presentation slide needs both a video and an image. A Document slide takes a PDF or an image.
TIP
You can always come back to the Media Library section to refresh your knowledge.

- Success! Now your slide contains the media of your choice. Press the Save button to save you progress.

Image Animation
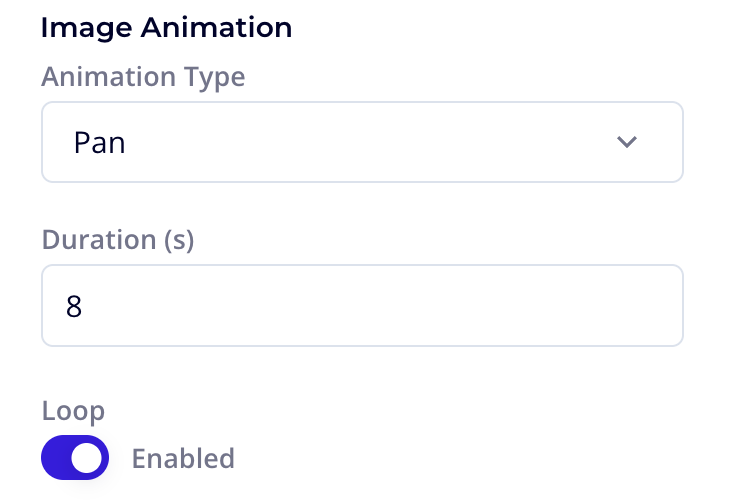
An Image slide can bring the still image to life with a slow animation. You find these settings under Image Animation at the bottom of the Edit slide panel.
| Setting | Description |
|---|---|
| Animation Type | Pan slowly moves across the image from one side to the other. Zoom Out starts slightly zoomed in and slowly zooms out. None shows the image without animation. |
| Duration (s) | How long one run of the animation takes, in seconds. Setting it to 0 turns the animation off. |
| Loop | When on, the animation starts over each time it finishes. |
New image slides use Pan for 8 seconds, with Loop on.
Good to know: Pan works best with an image that is wider than the Videobot, such as a landscape photo. The animation only applies to Image slides.
Linking Slides with Buttons 🔗
Once you’ve added a second slide:
- Go back to the Intro slide.
- Click Add button.

- Under Link to, select the second slide.

- Give your button a name.
- Click Save
TIP
You can also link slides by drawing lines between them in the Flow View, which shows your whole Videobot as a map.
Copying Slides and Actions to Another Videobot
You can copy a slide or an action from one Videobot and paste it into another one.
- Open the Videobot you want to copy from and go to the Content tab in the Grid view.
- Copy the slide or action:
- For a slide, click the Copy icon on its card, or open the slide and click Copy at the bottom of the Edit slide panel.
- For an action, click the Copy icon on its card.
- Open the Videobot you want to paste into and go to the Content tab in the Grid view.
- Click the Paste slide or Paste action card. It shows the name of the Videobot you copied from.
- Click Save.
When you paste a slide, the slides and actions its buttons link to are copied along with it, so the pasted part of the flow keeps working. To clear what you copied, click the × on the paste card.
Good to know: To make a copy of a slide inside the same Videobot, open the slide and click Duplicate instead. Adaptive settings on a slide are not copied to another Videobot.
Preview and Save 💾
- Check how your Videobot looks by clicking Preview in the top right corner.
- Click Save
IMPORTANT
Don’t forget to hit Save to ensure your work is saved!