Videobot Wix Integration Guide for Widgets
Follow this simple guide to integrate your Videobot widget into your Wix website.
Step 1: Access the Wix Editor 🛠️
- Log in to your Wix account and open the Editor for the website where you want to embed the Videobot.
- Navigate to the page where you want the Videobot widget to appear.
Step 2: Add an Embed Code
- In the Wix Editor, click on the Add (+) button located on the left sidebar.
- Scroll down and select Embed Code.
- From the options, choose Embed HTML.
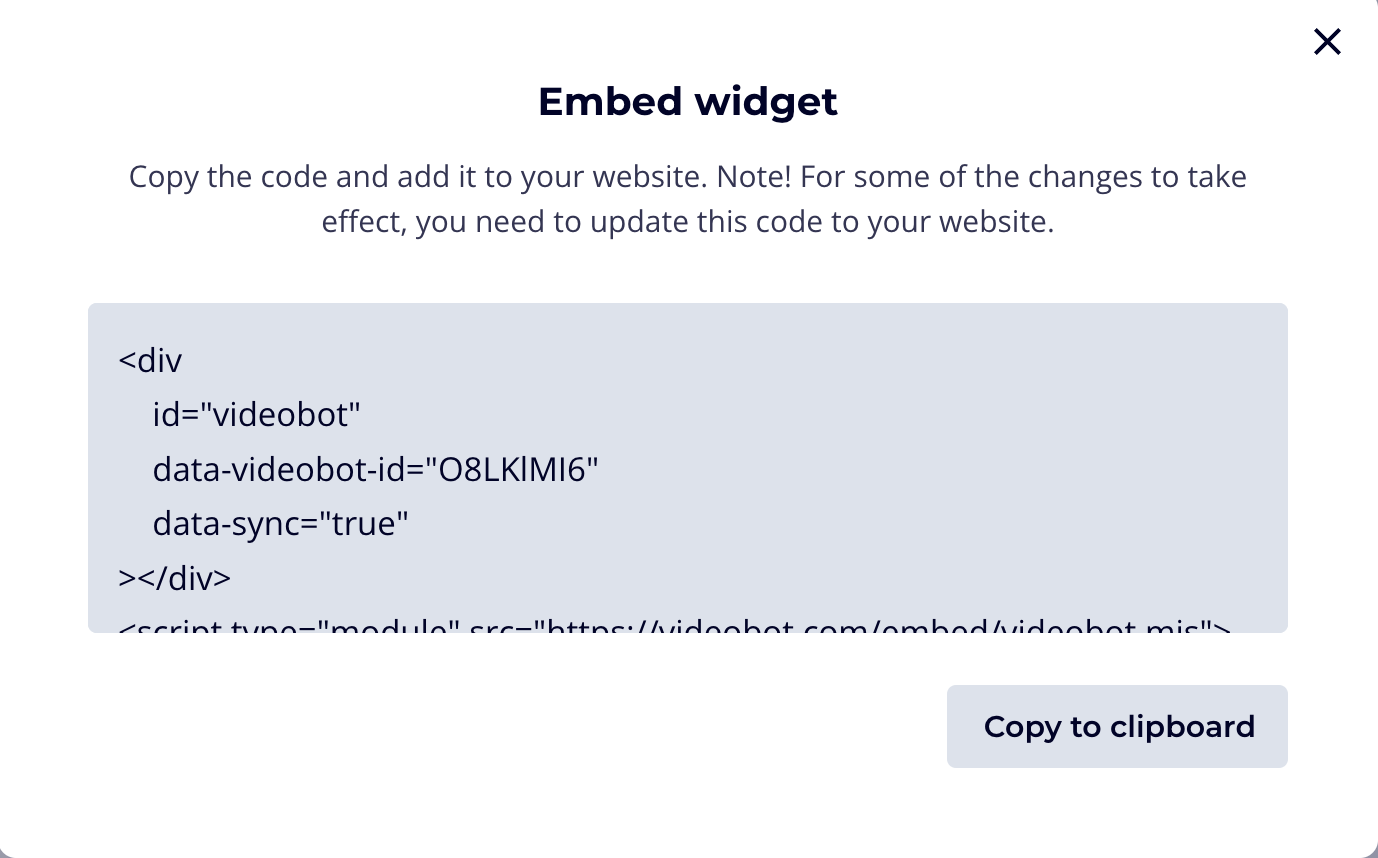
Step 3: Copy the Embed Code from Videobot
- In a separate browser tab, log in to your Videobot Dashboard.
- Select the Videobot you want to embed.
- Navigate to Share & Embed, then choose either Widget or iFrame.
- Click Publish, then Show Embed Code.
- Copy the generated embed code.
Step 4: Embed the Code on Your Wix Site
- Return to the Wix Editor and paste the embed code into the HTML settings box that appears after you selected Embed HTML.
- Adjust the size and position of the widget within the editor to fit your website’s layout.
Step 5: Publish Your Wix Site 🌐
- After embedding the code and ensuring everything is aligned properly, click Publish to make the changes live on your Wix website.
Step 6: Edit Site (to embed IFrame)
Click on the Site and App option on the left menu in the Wix Editor. In the Website section on the page that opens, select Edit Site.
On a new page that opens, press the + Add elements button. Select Embed Code from the list that opens, and Custom Element. Adjust the position and size of the element that appears.
Step 7: Configure Your Custom Element ⚙️
Click on the Choose source option on the top menu of the Custom component.
In the Element Attributes modal that appears, select Velo file. For the Tag name, please enter videobot-element. Create a new Velo file by pressing the Create New button in the dropdown.
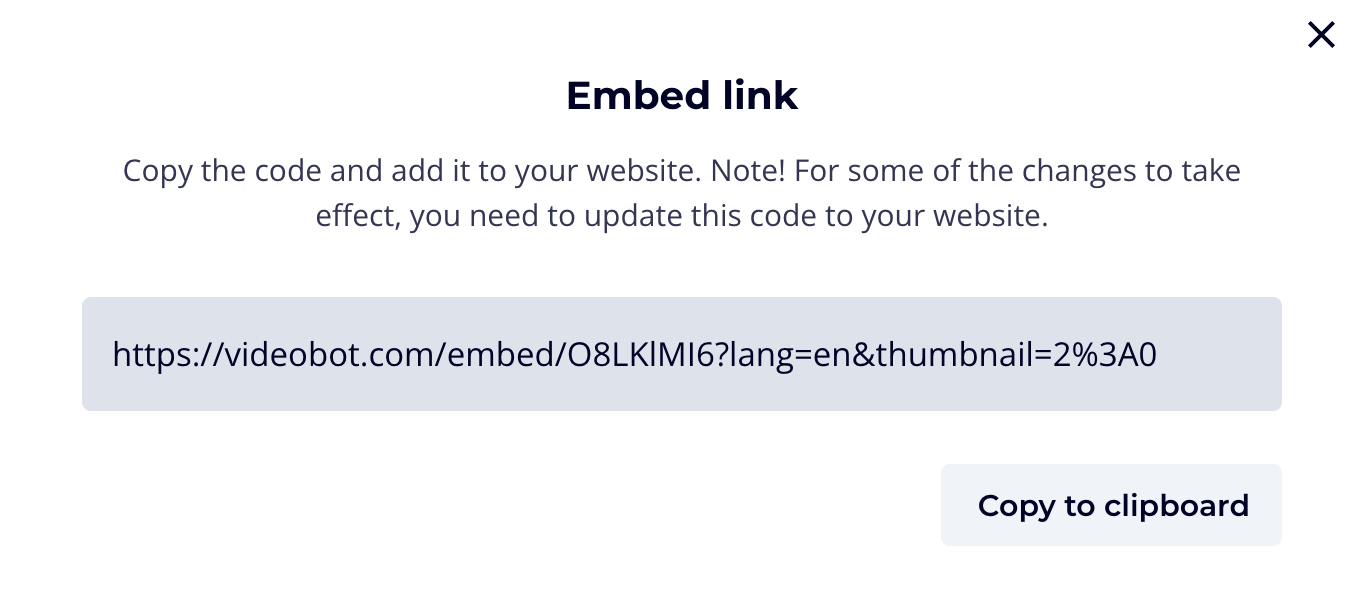
Select the Videobot you want to embed. Navigate to Share & Embed, then choose Link. Click Show Link, then Copy the generated link.
On a page, .wix-default-custom-element.js will appear. Remove all the code and replace it with the code below, replacing iframe.src with the link you have just copied:
class Videobot extends HTMLElement {
  constructor() {
    super();
    // Create the iframe element
    const iframe = document.createElement('iframe');
    iframe.src = 'https://videobot.com/embed/O8LKlMI6?lang=en&thumbnail=2%3A0';
    iframe.frameborder = 0;
    iframe.height = 650;
    iframe.width = 340;
    iframe.style.borderRadius = '10px';
    iframe.scrolling = 'no';
    iframe.allow = 'clipboard-write;web-share';
    // Append the iframe to the custom element
    this.appendChild(iframe);
  }
  connectedCallback() {
    // Additional setup if needed
  }
}
customElements.define('videobot-element', Videobot);
Success! Adjust to Your Liking 🎉
Click the Preview button at the top-right corner of the Wix Editor window to preview your changes.
Preview to see your Videobot on your website. Adjust the sizing and position of your Custom Component to your preference. If any problem occurs during any of these steps, don’t hesitate to contact us for help.
Finally, press the Publish button on the top-right corner of the Wix Editor to make your changes live!
That's it! You've successfully embedded the Videobot widget into your Wix website. Now, your visitors can engage with your Videobot seamlessly.